


The Art of Apple Pie, and a Pie Crust Recipe to Use Anywhere
In our community growing up, my mum Ella Ingraham made the best pie crust, and the best apple pie. This proclamation is based on my love for my mother and my own taste – but I’m not alone! Every year when I was little, our church held an Apple Festival. My mum would be on the team making tons of pies to sell for fundraising. All the bakers in the church pitched in time and pies. I got to try a lot of apple pie there. And when it came to the sale, my mum’s pies always sold out. The word was on the street.
I’d say I’ve informed my pie palate even more since that time, and I still circle back to what I learned then. Ella’s pie is the best!
There are two factors in the perfection. They are an excellent crust, and letting the apples speak for themselves.
I have been wanting to learn this art of pie-making. Over the last few years, we make a yearly date to produce a set of pies together for Thanksgiving. It is so clear, working closely with her in the kitchen, that she has a feel for ingredients and outcome that is much more patterned and detailed than the written recipe she follows. I could never follow that recipe and get the same result.
Last year, I finally took a bunch of photos of the process, to record the detail of what I’m learning, and what I tend to forget from one November to another. I hope this can be useful to you in creating delicious pies with a wonderful flaky crust!
How to Get Local Apples from the Farm:
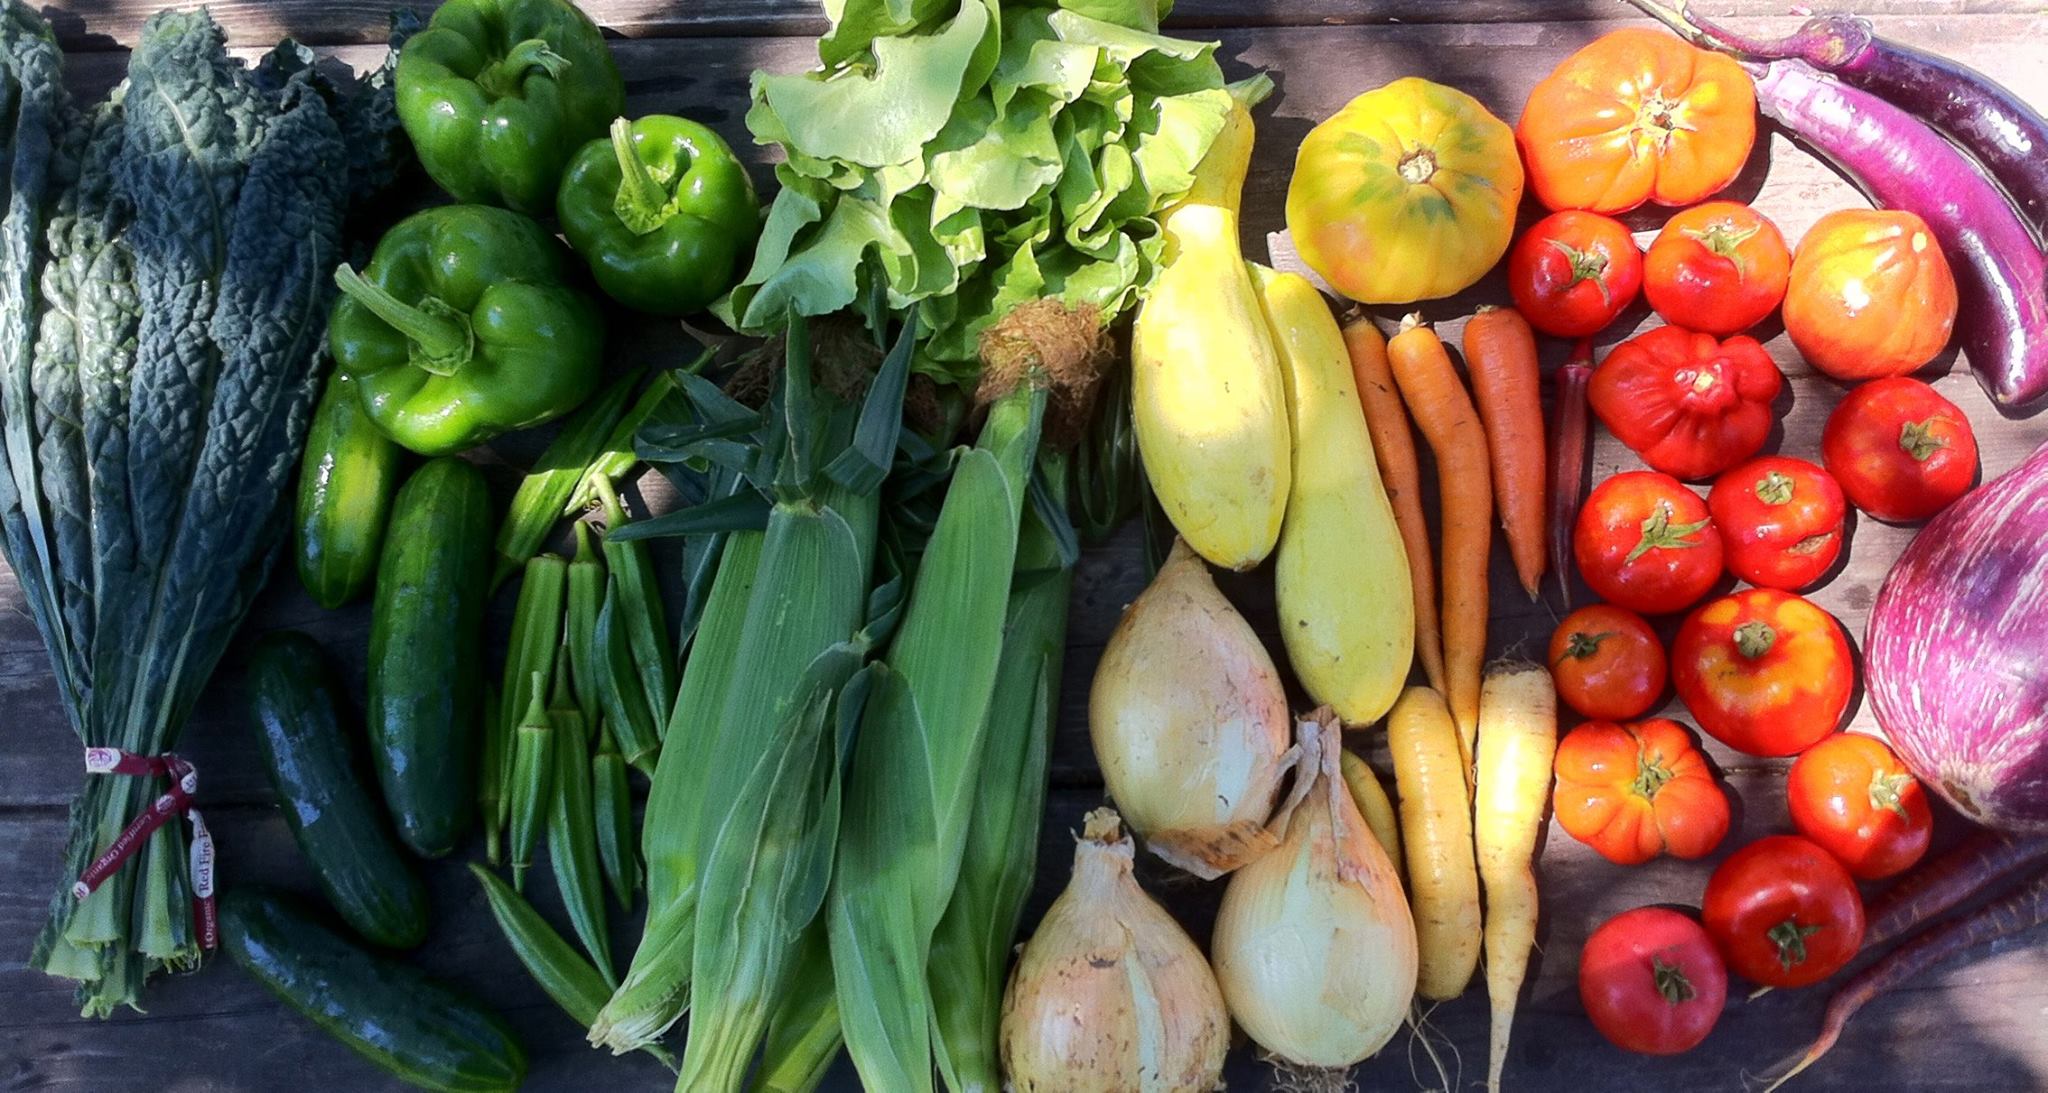
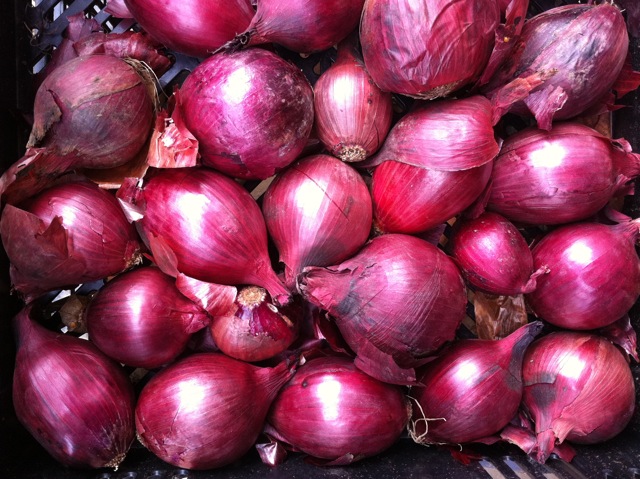
We have local apples for sale at our Granby Farm Store, which has open hours through Thanksgiving, and you can also order at discount prices bushels of local apples for pies, sauces, drying and more through our Bulk Order page. We have all sorts of organic produce from winter squash and onions, to sweet potatoes and spinach for bulk order now, and at our stand and markets.
About the Recipes:
These below are my mother’s favorite recipes to use, from The Joy of Cooking by Irma S. Rombauer. We have adapted and added details and notes from how we make them at home.
Flour Paste Pie Crust
This recipe makes enough for one double-crust (top and bottom) 9 inch pie. You can double or triple as needed. This is a great crust recipe for many types of pies, including Sweet Potato Pie.
Ingredients:
2 cups all purpose flour (sifted) – we often use about half whole wheat pastry flour
1tsp salt (re-sifted with flour)
1/4 cup cold water for the paste
A little more water when gathering dough together, or unflavored vodka which moistens now and then evaporates when cooking
2/3 cup unsalted butter (or shortening) – use cold butter
Some additional flour for rolling out the crust
Cream or milk for brushing on the crust just before baking
- First, sift flour. Add salt, then sift a second time.
- Take 1/3 of your salt and flour mixture and combine with water to form a paste, and set aside.
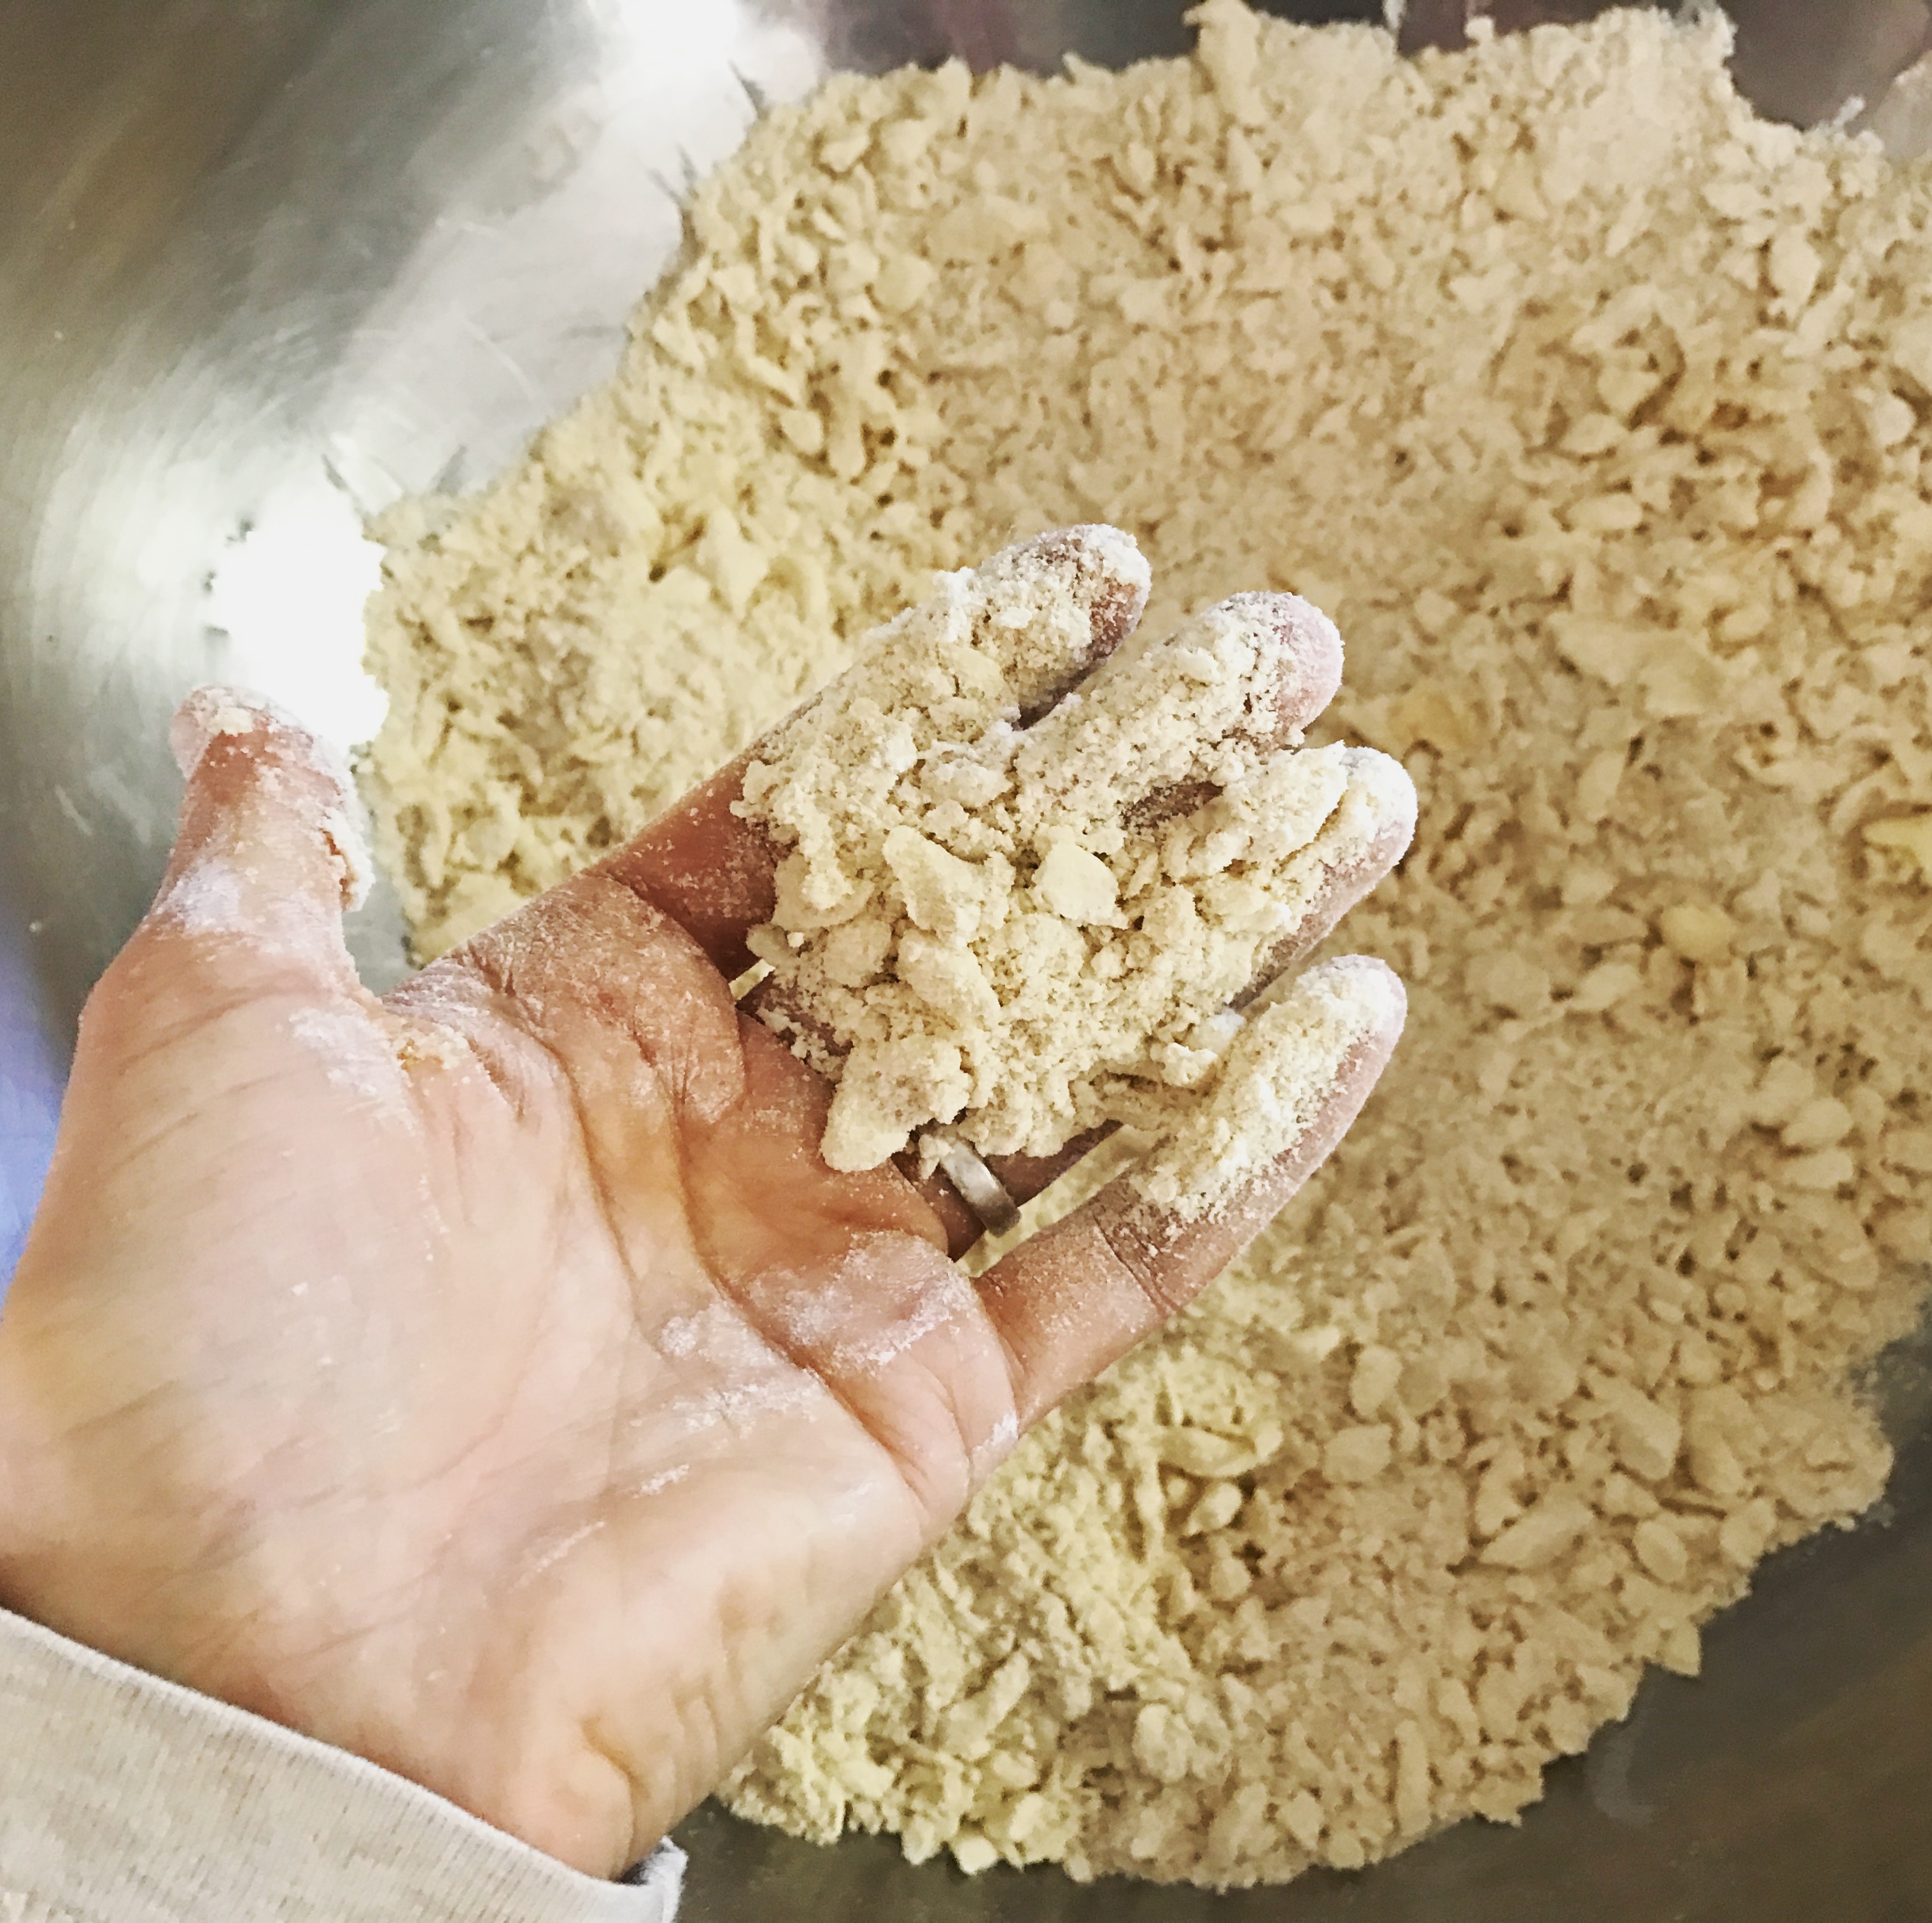
- Next, cut the butter into the remaining flour. You can do this in various ways, from using your fingers to crumble the butter and flour together, to chopping at it with two butter knives, to a multi-bladed pastry blender, to a food processor on pulse. The important thing is that the texture at the end still contain small lumps of butter, as pictured below. It has been described as “coarse granola.”
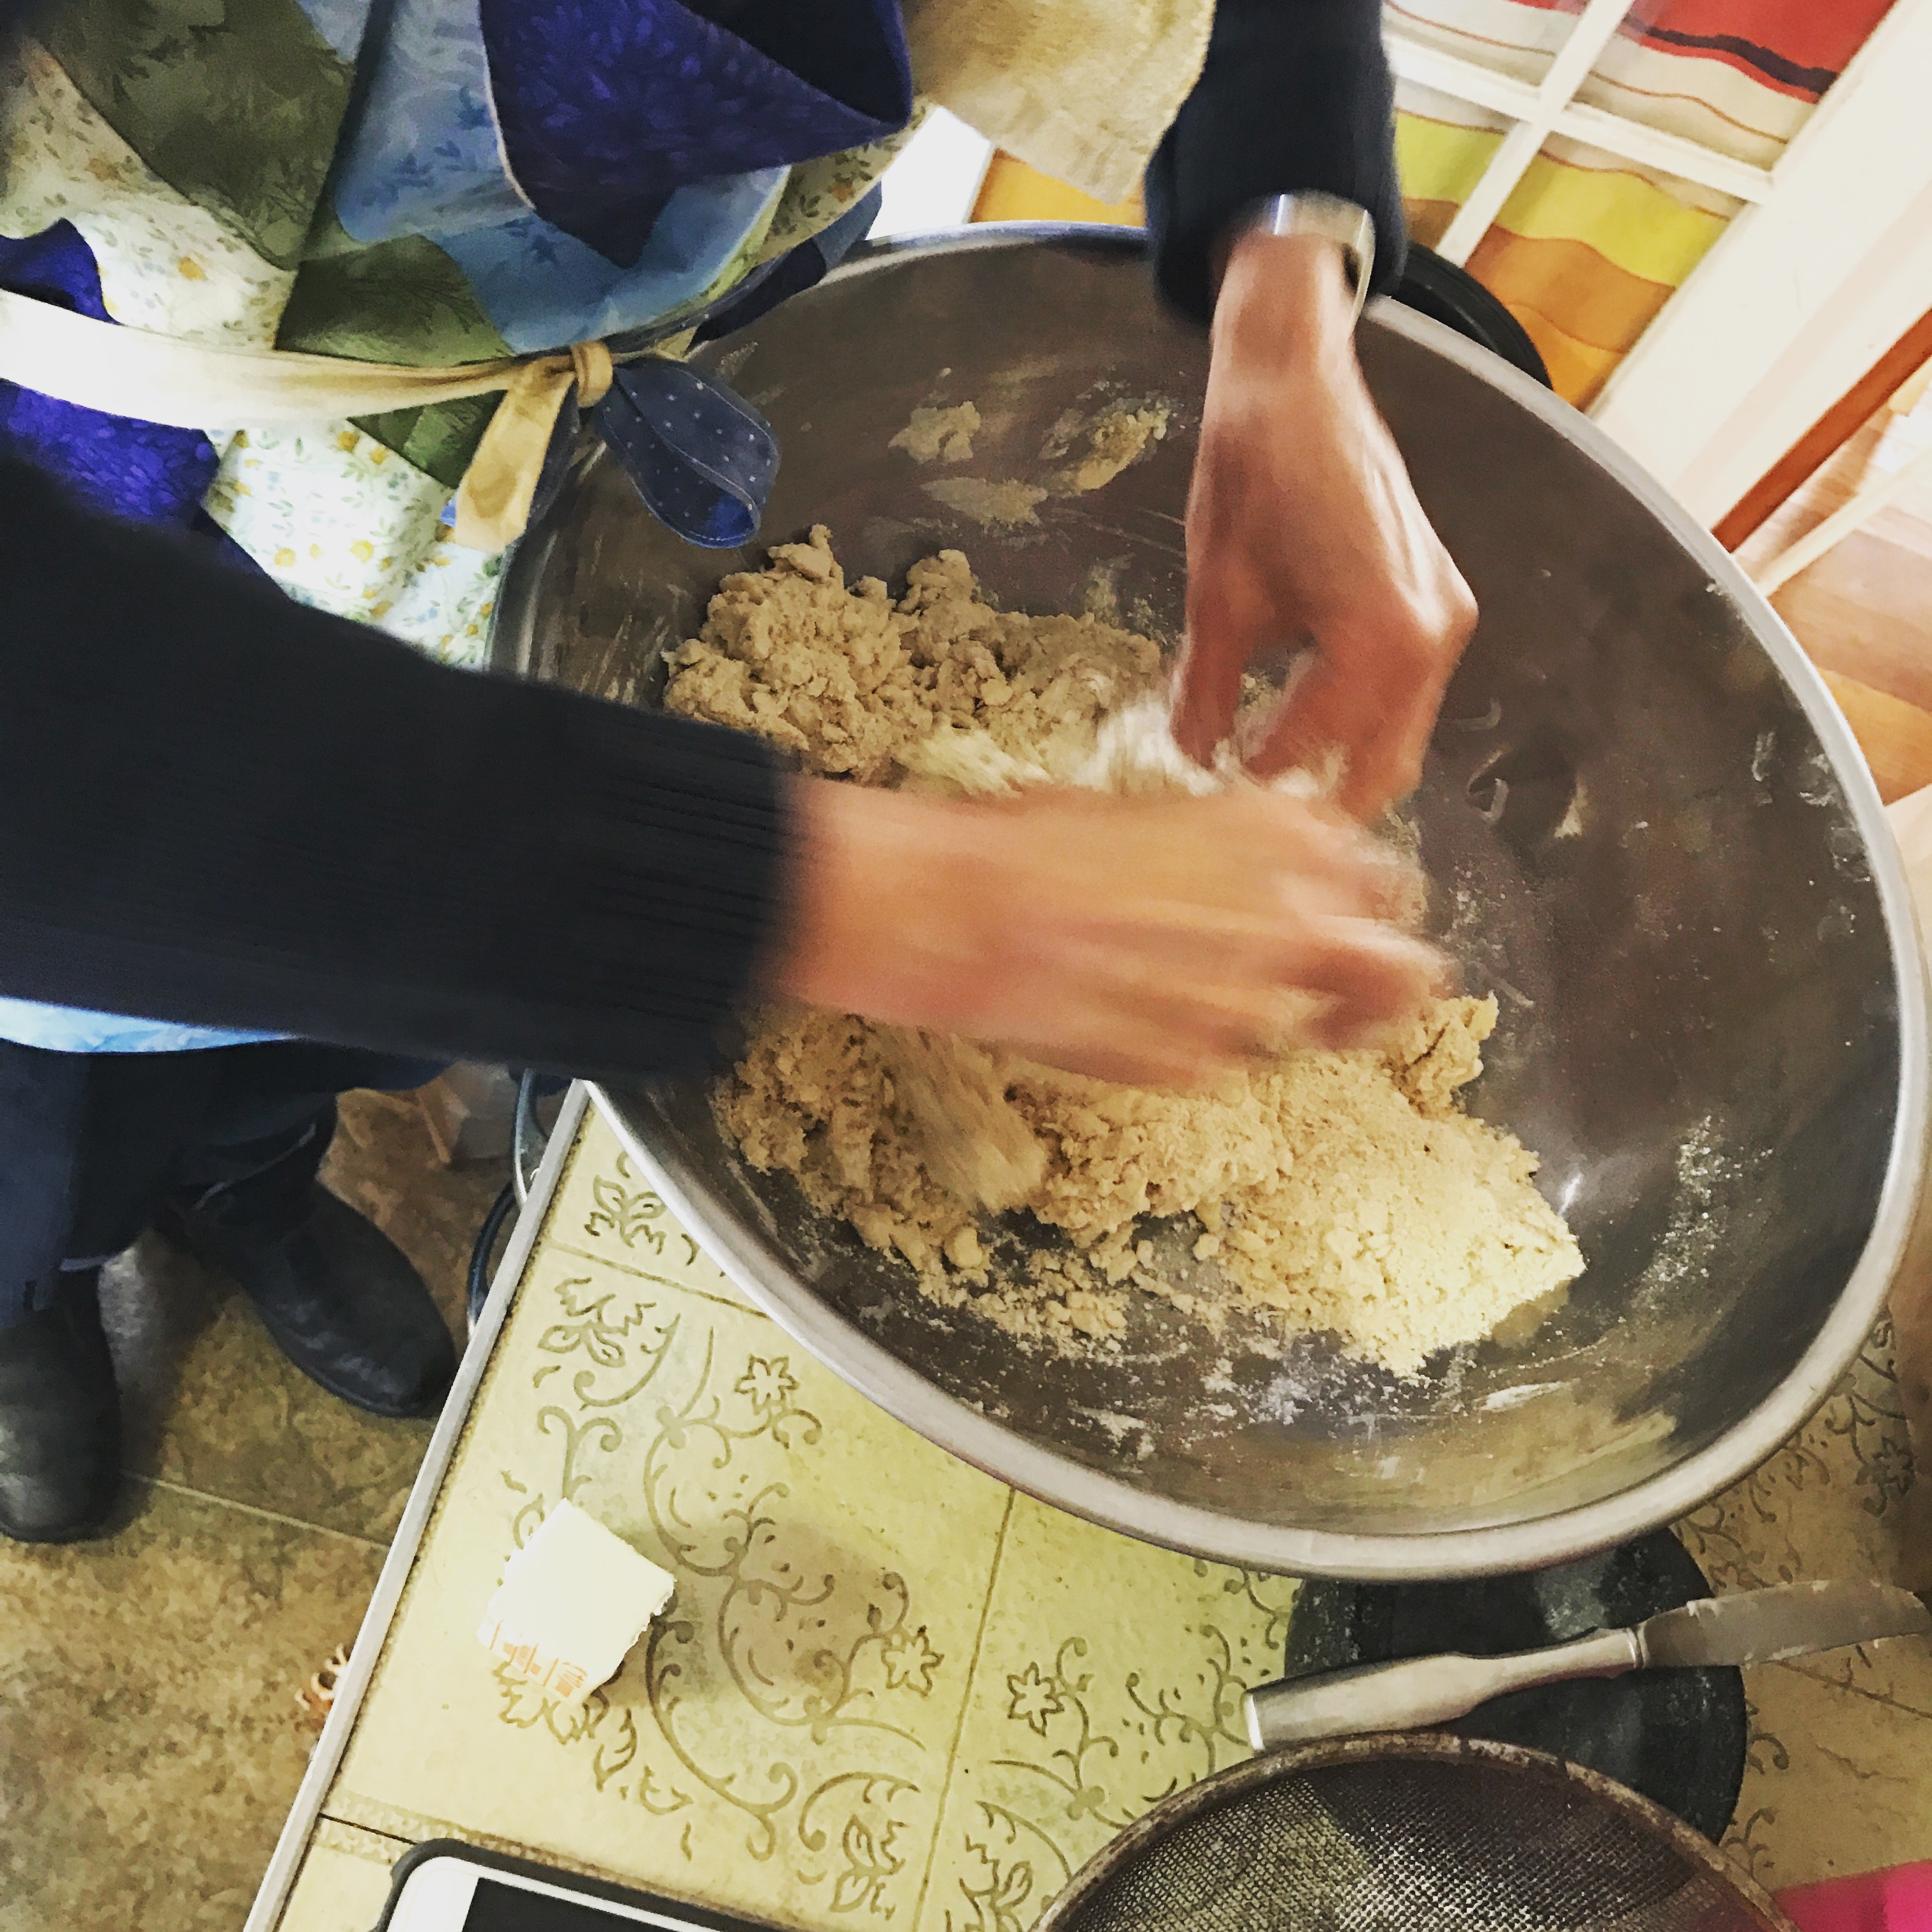
- Combine both paste and butter-flour mixture, then promptly and gently form into a ball. Add a little more water here if needed, just enough to form it together, see pictures.
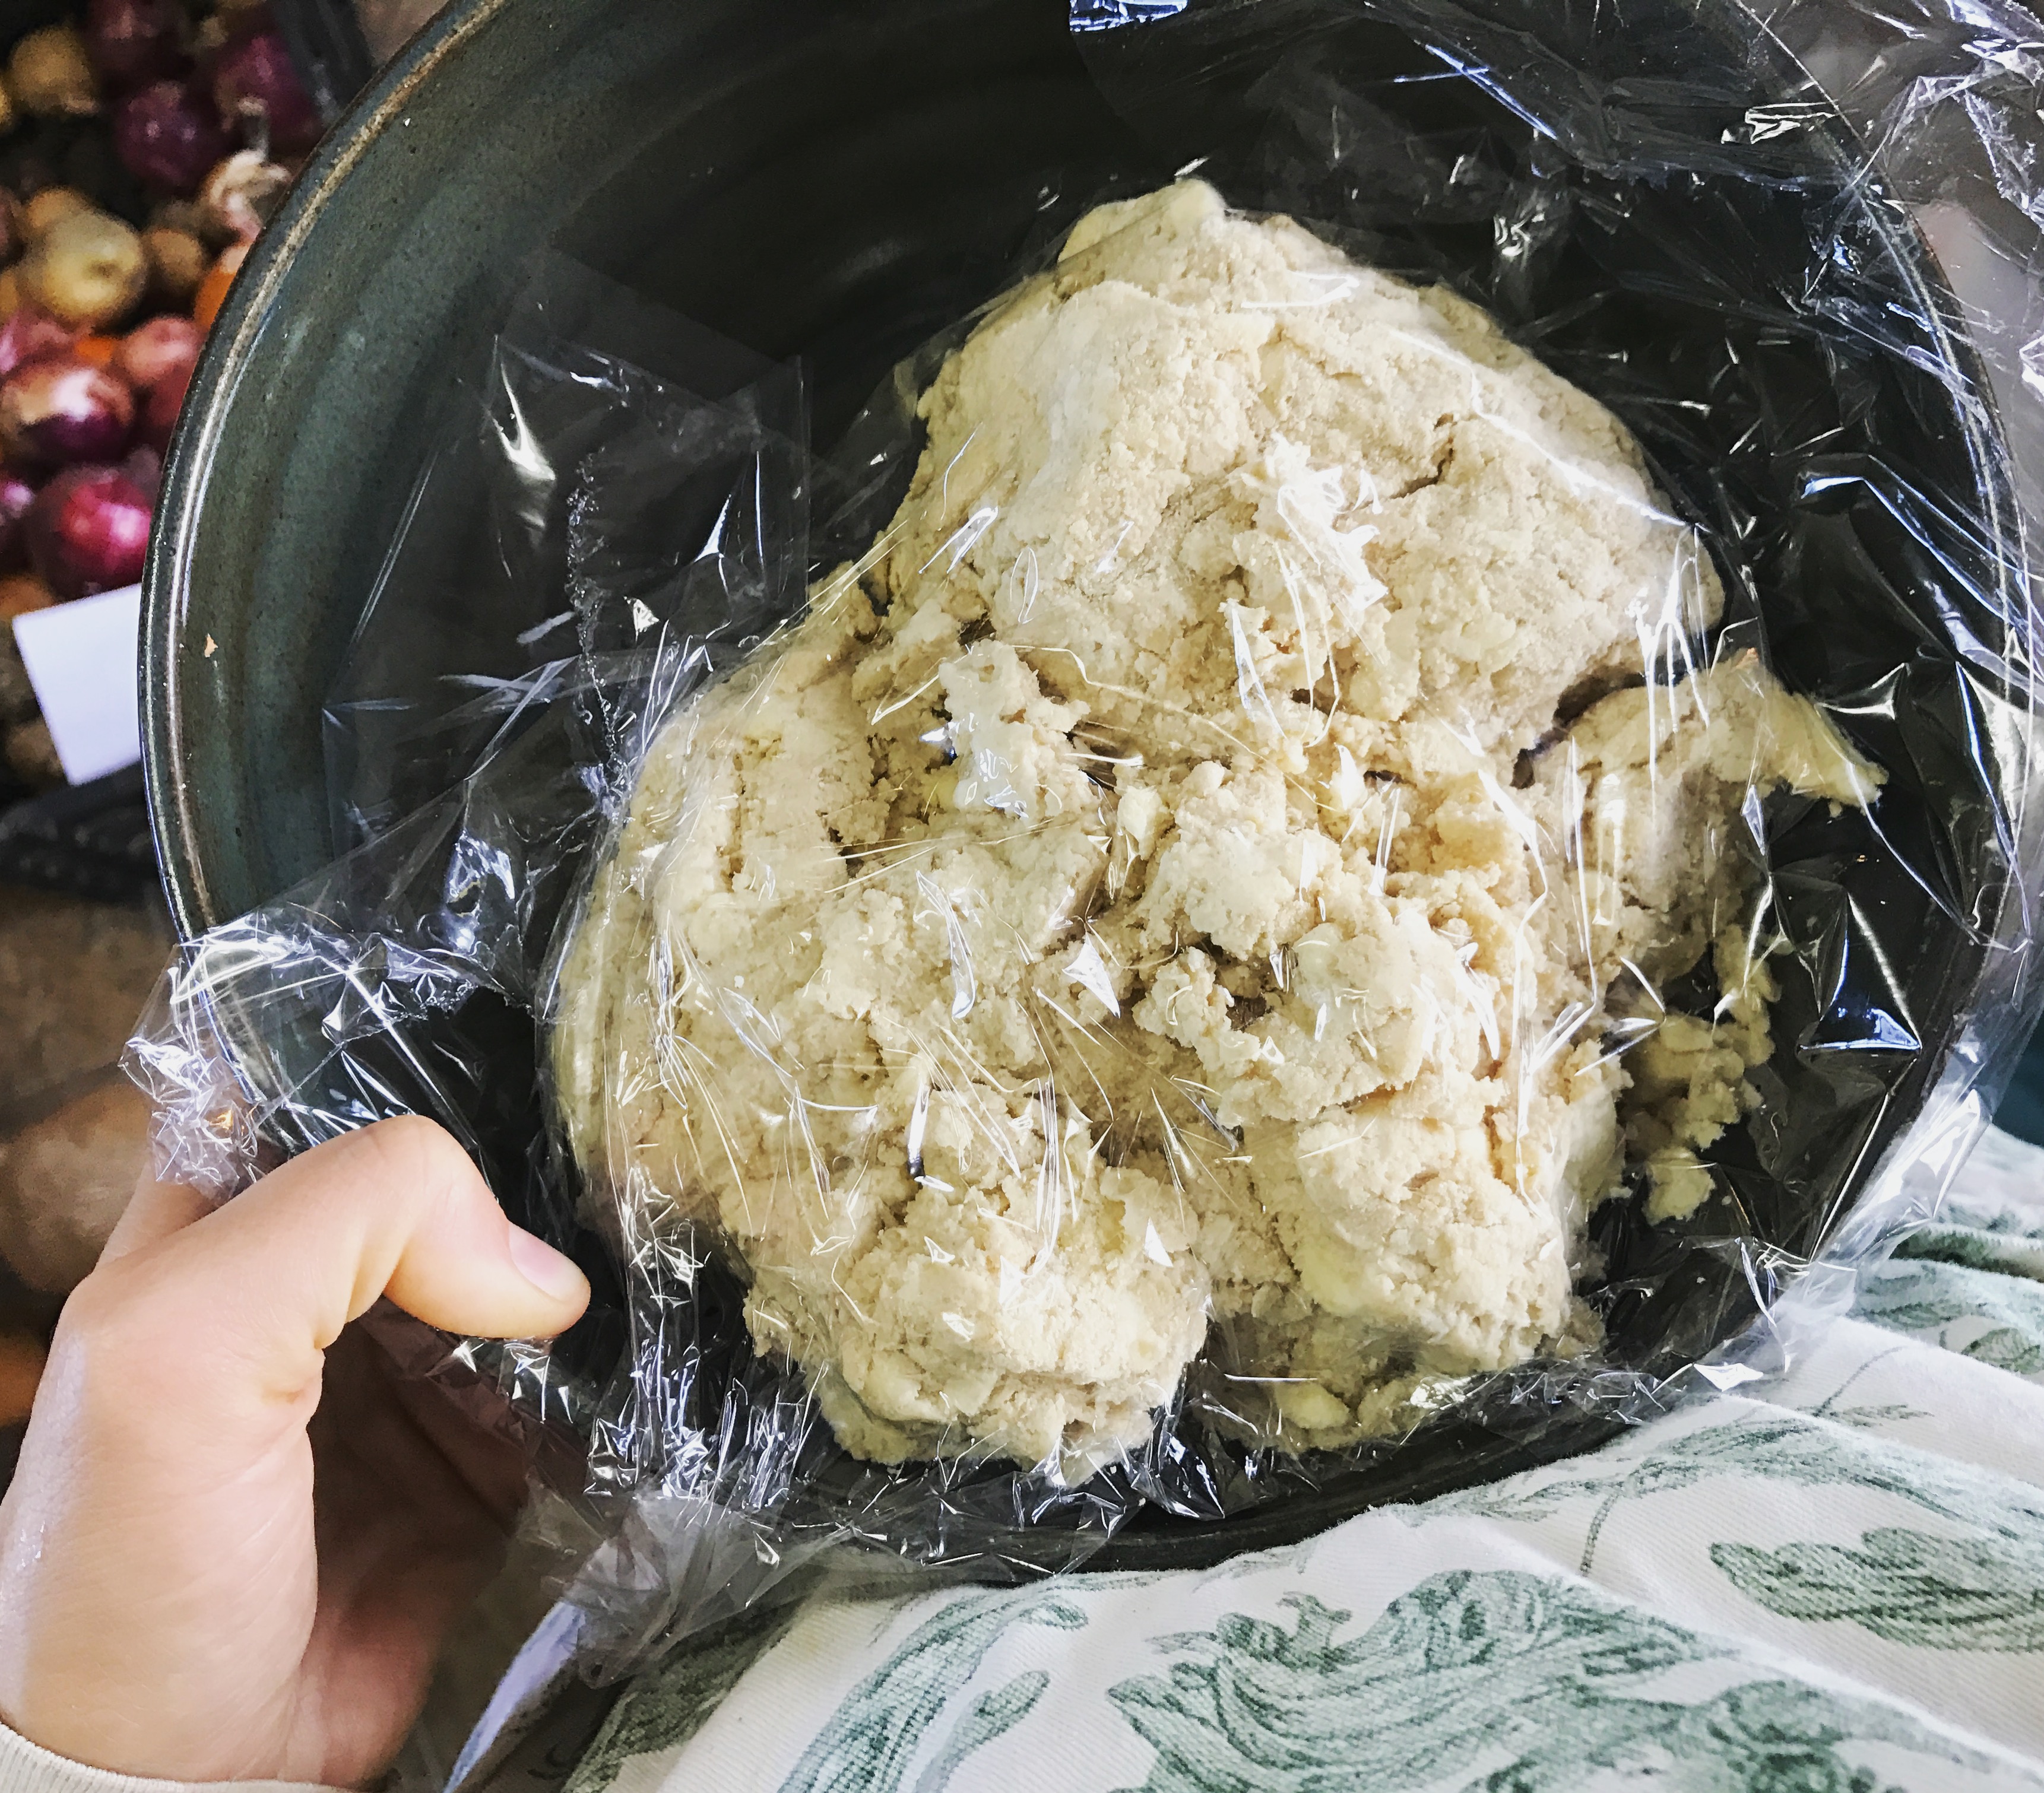
- Wrap the dough tightly in plastic wrap, and chill for at least 1/2 hour (or overnight.) You can freeze the dough if making ahead. To defrost, set in fridge for a day, or in room temperature for 2 hours. You can also form the bottom crust and freeze it in a pie plate for making pies later.
While chilling is a good time to make the apple filling…
Apple Pie Filling
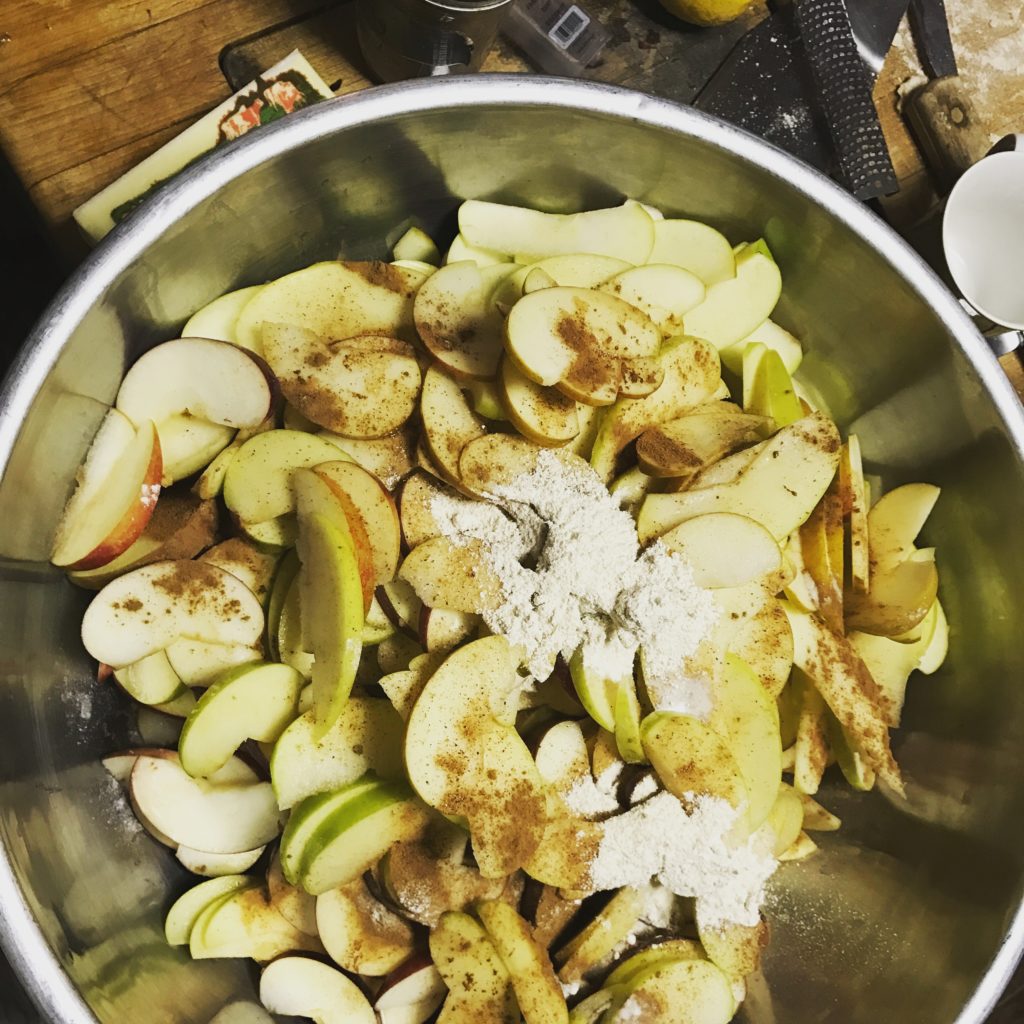
5-6 cups apples, sliced thinly * see variety notes below
1/8 tsp salt
1 to 1 1/2 Tbs flour or cornstarch
1/4 tsp cinnamon
1/8 tsp nutmeg (freshly ground if available)
1 Tbs lemon juice
1/2 tsp lemon zest
1 tsp vanilla extract
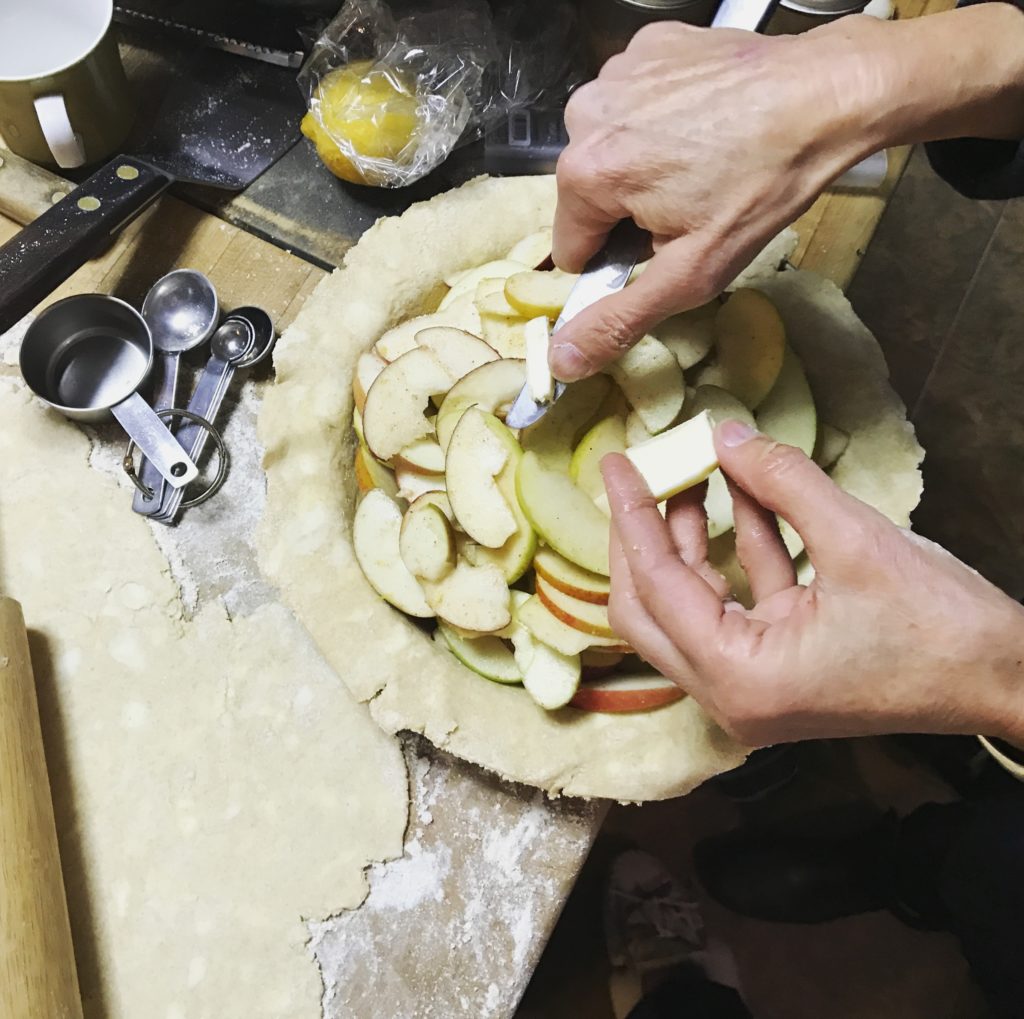
1 1/2 Tbs butter – for after you’ve put the filling in the pie shell
- Important Note, the original recipe recommends 1/2 cup to 2/3 cup white or brown sugar, but we make it without, and like it better 🙂 I think this is one of the changes from other pie recipes that really lets you taste the apples.
Apple Variety Notes
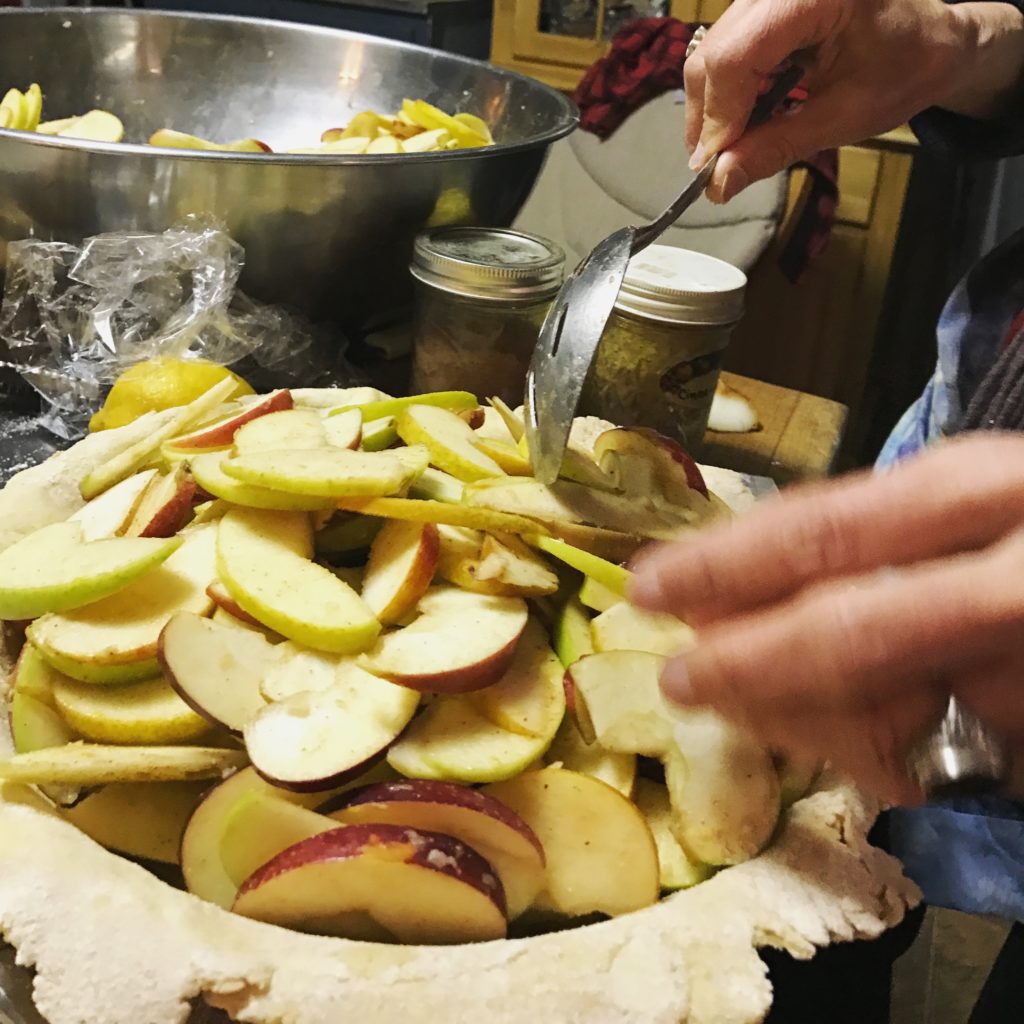
My mum likes a mix of types, including a crisp tart green type, Cortland, and a few others that have good sweetness and complexity. The mix of apple varieties gives a depth of flavor that is one of the keys to making the best pie. She says, “I always use some Cortlands because they taste quite good and they have a beautiful color. They turn pink!” We leave the skins on, as they soften up nicely while cooking and add flavor and color.
How to make the filling:
- Remove bruises, core the apples, and slice very thinly, leaving skins on.
- Stir to mix the apples with all the filling ingredients, except the butter.
Putting the Pie Together
- Preheat oven to 450 F.
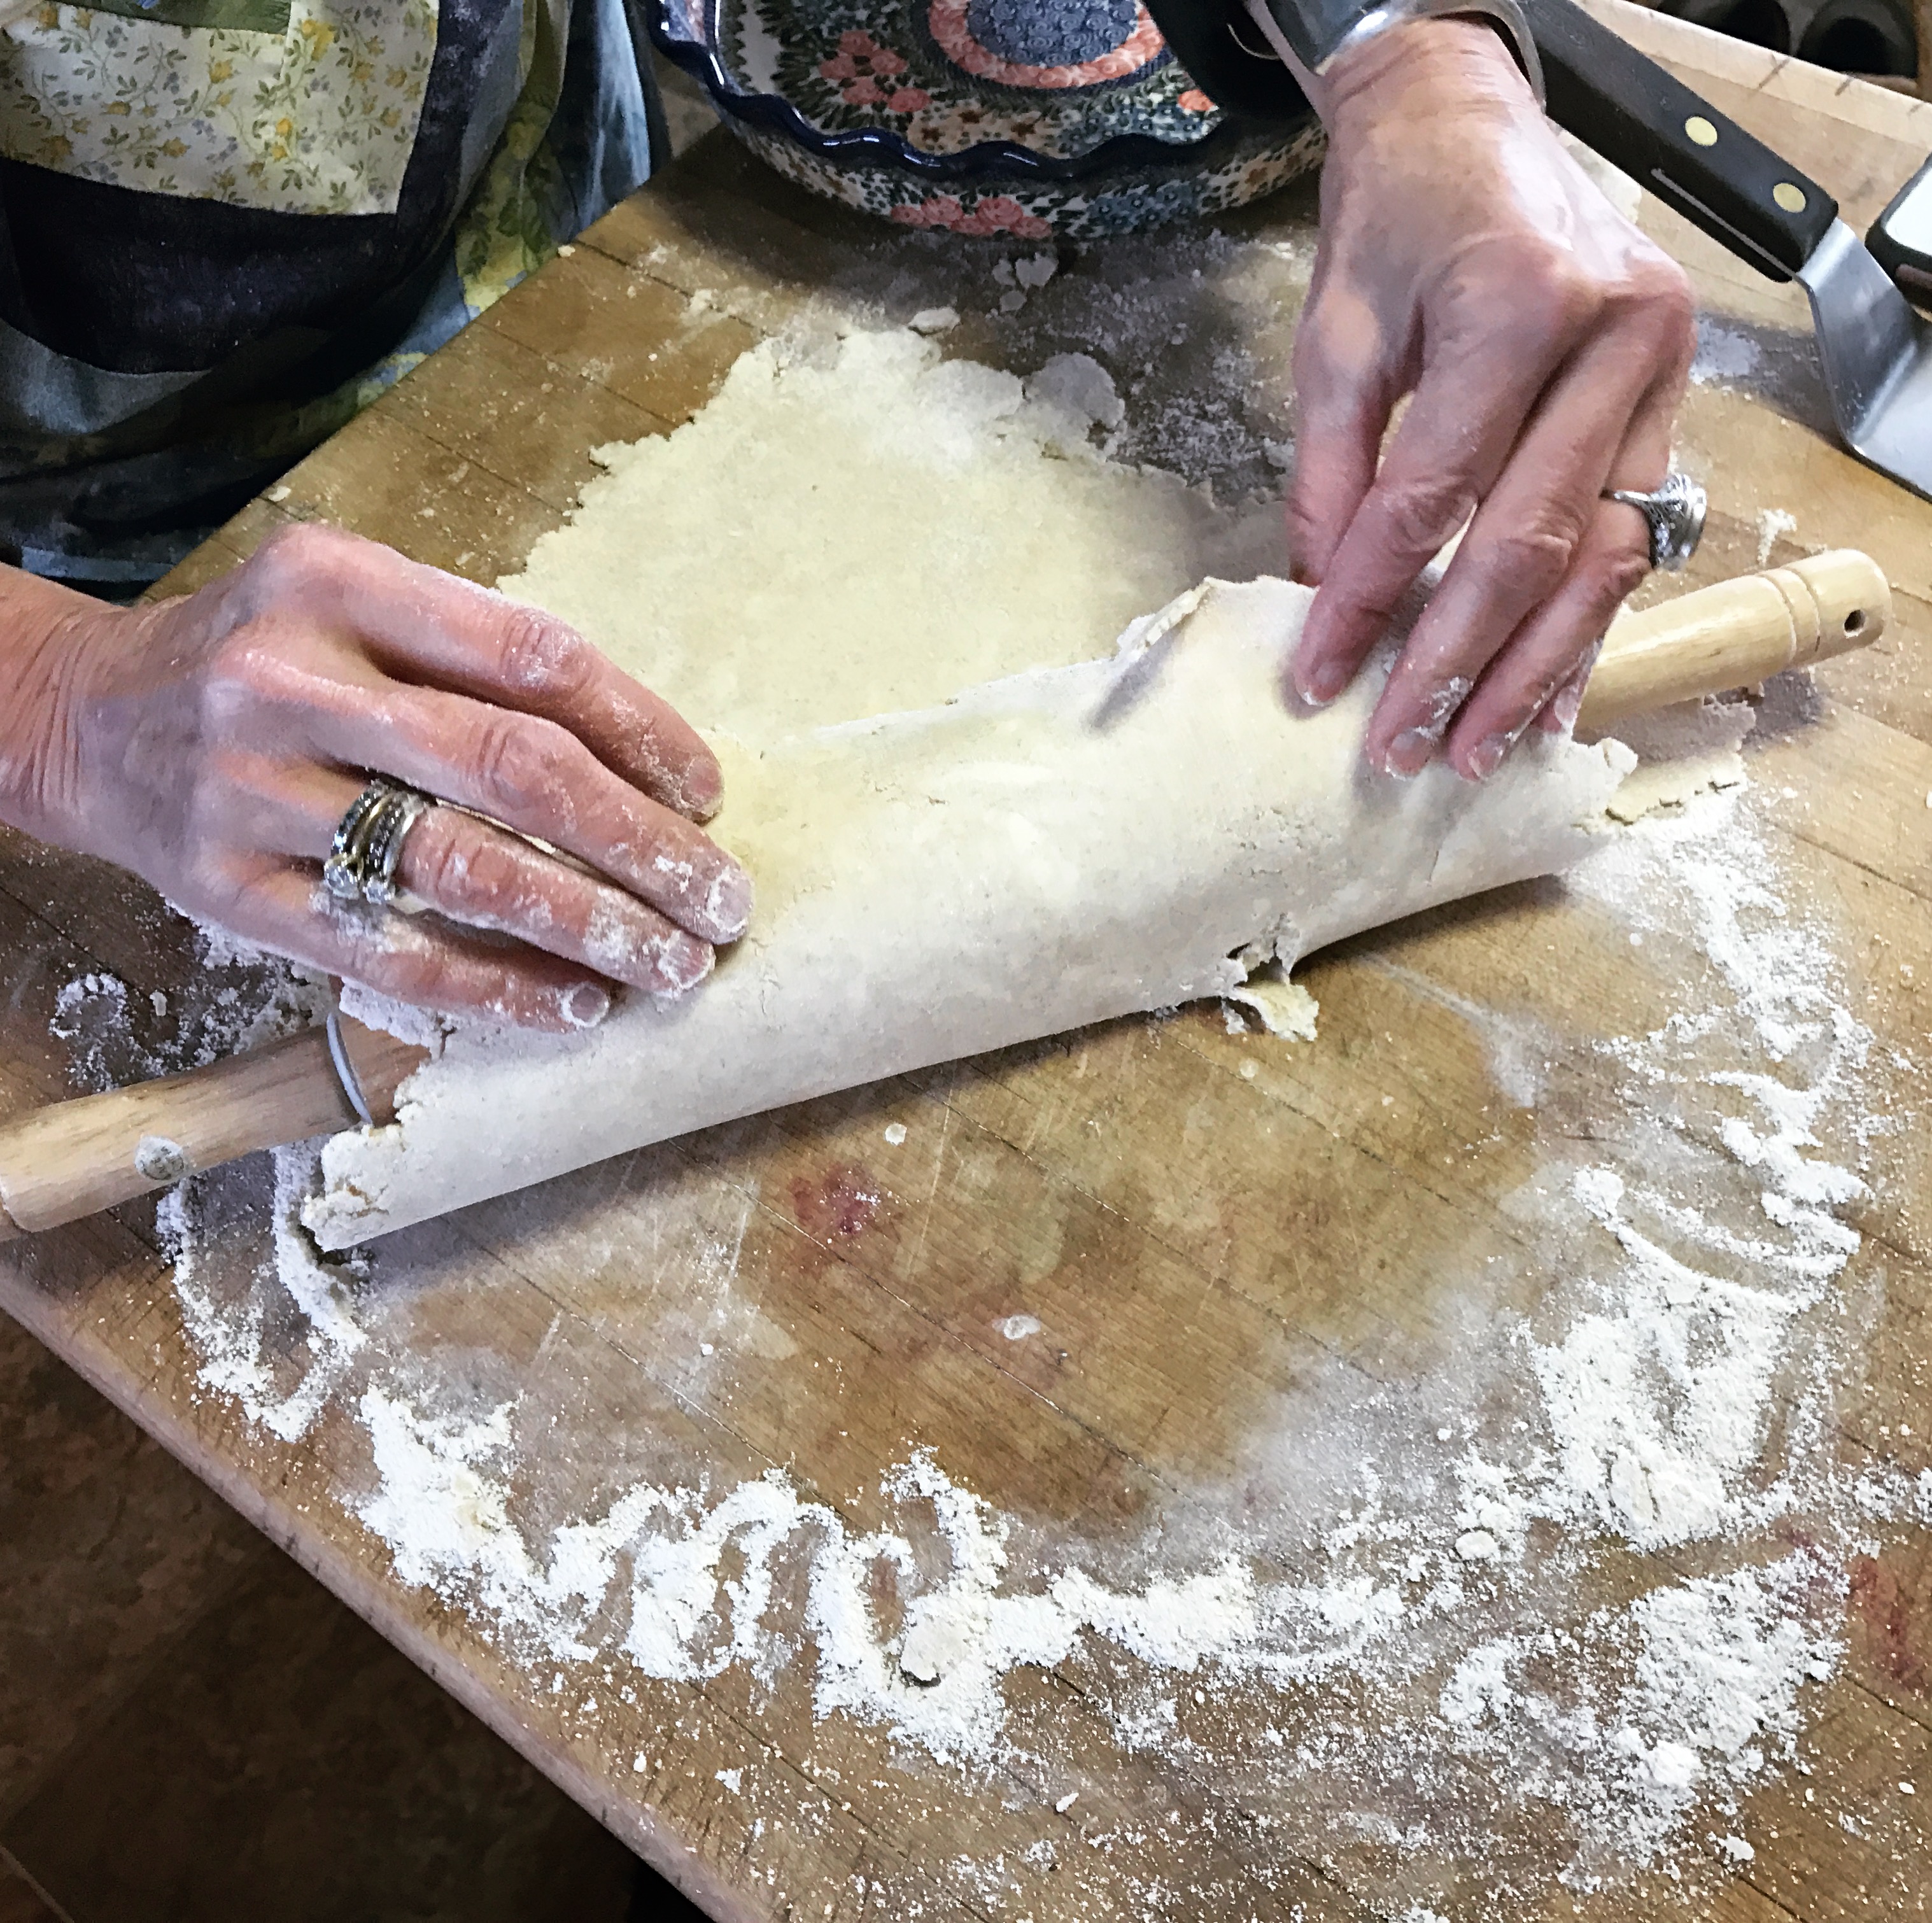
- When ready to make the pies, split chilled dough into 2 equal parts. Roll out one at a time on a floured surface until they make rounds about 1/8 inch thick. Work the dough as little as possible. I’ve watched my mum delicately patch holes formed when rolling, pressing the little piece of dough just enough to connect it to the rest. It is a tender thing to keep a crust flaky.
- Line a 9 inch pie pan with one round of the rolled out pie dough from above, and trim off excess dough that hangs over the edge of the pan.
- Layer the apple filling into the pie, getting them densely packed, and piled high.
- Dot the top of the apple pile with the 1 1/2 Tbs butter from the filling recipe
- Lay over the top the other round of pie dough. Take the two layers of dough at edges by the pie rim and fold from the top under, so the top dough is hugging around and under the bottom dough, and it all fits nicely on the pie plate. Then crimp the edges down with a fork or finger tips to seal and make a pattern all around the rim. This is kind of hard to explain, so see pictures below.
- Poke holes in the upper crust in some kind of design, to allow steam to escape, and to make the pie pretty.
- Brush the surface of the pie crust with a brush dipped in cream or milk to give a nice shine to the crust.
- Put into the oven to bake at 450 for 10 minutes
- Turn down the oven to 350, and bake another 35-45 minutes until pie is done.
How to tell when the pie is done:
You want the filling to boil, so you should hear bubbling or see places where juices have bubbled up. You can poke with a small knife to see if the apples are tender. Consider making a couple larger holes in your crust design to allow knife poking :). Also the crust should be nicely golden brown.
You can use tin foil over the crust to reduce more browning, if it is getting too brown but the inside isn’t bubbling yet. Foil over the whole top, or just in a circle around the outer crust rim will cut back on browning, allowing more baking time.
Serving the Pie
You can serve them hot, or room temperature. If allowed to cool, the pie’s juices will set up better to stay in place when cut. I am quite fond of having excesses of whipped cream around at Thanksgiving to dollop on apple and pumpkin and other pies at serving time. A bit of ice cream is quite nice too.
Now, How to Make Apple Pie, in Photos!
Scroll down for some more detailed tips on parts of the process.
Here’s what the flour paste looks like:
Cut the butter into the flour until it looks like the mixture below – with some reasonable little chunks of butter in there. These butter nubs are key for achieving flakiness in the crust.
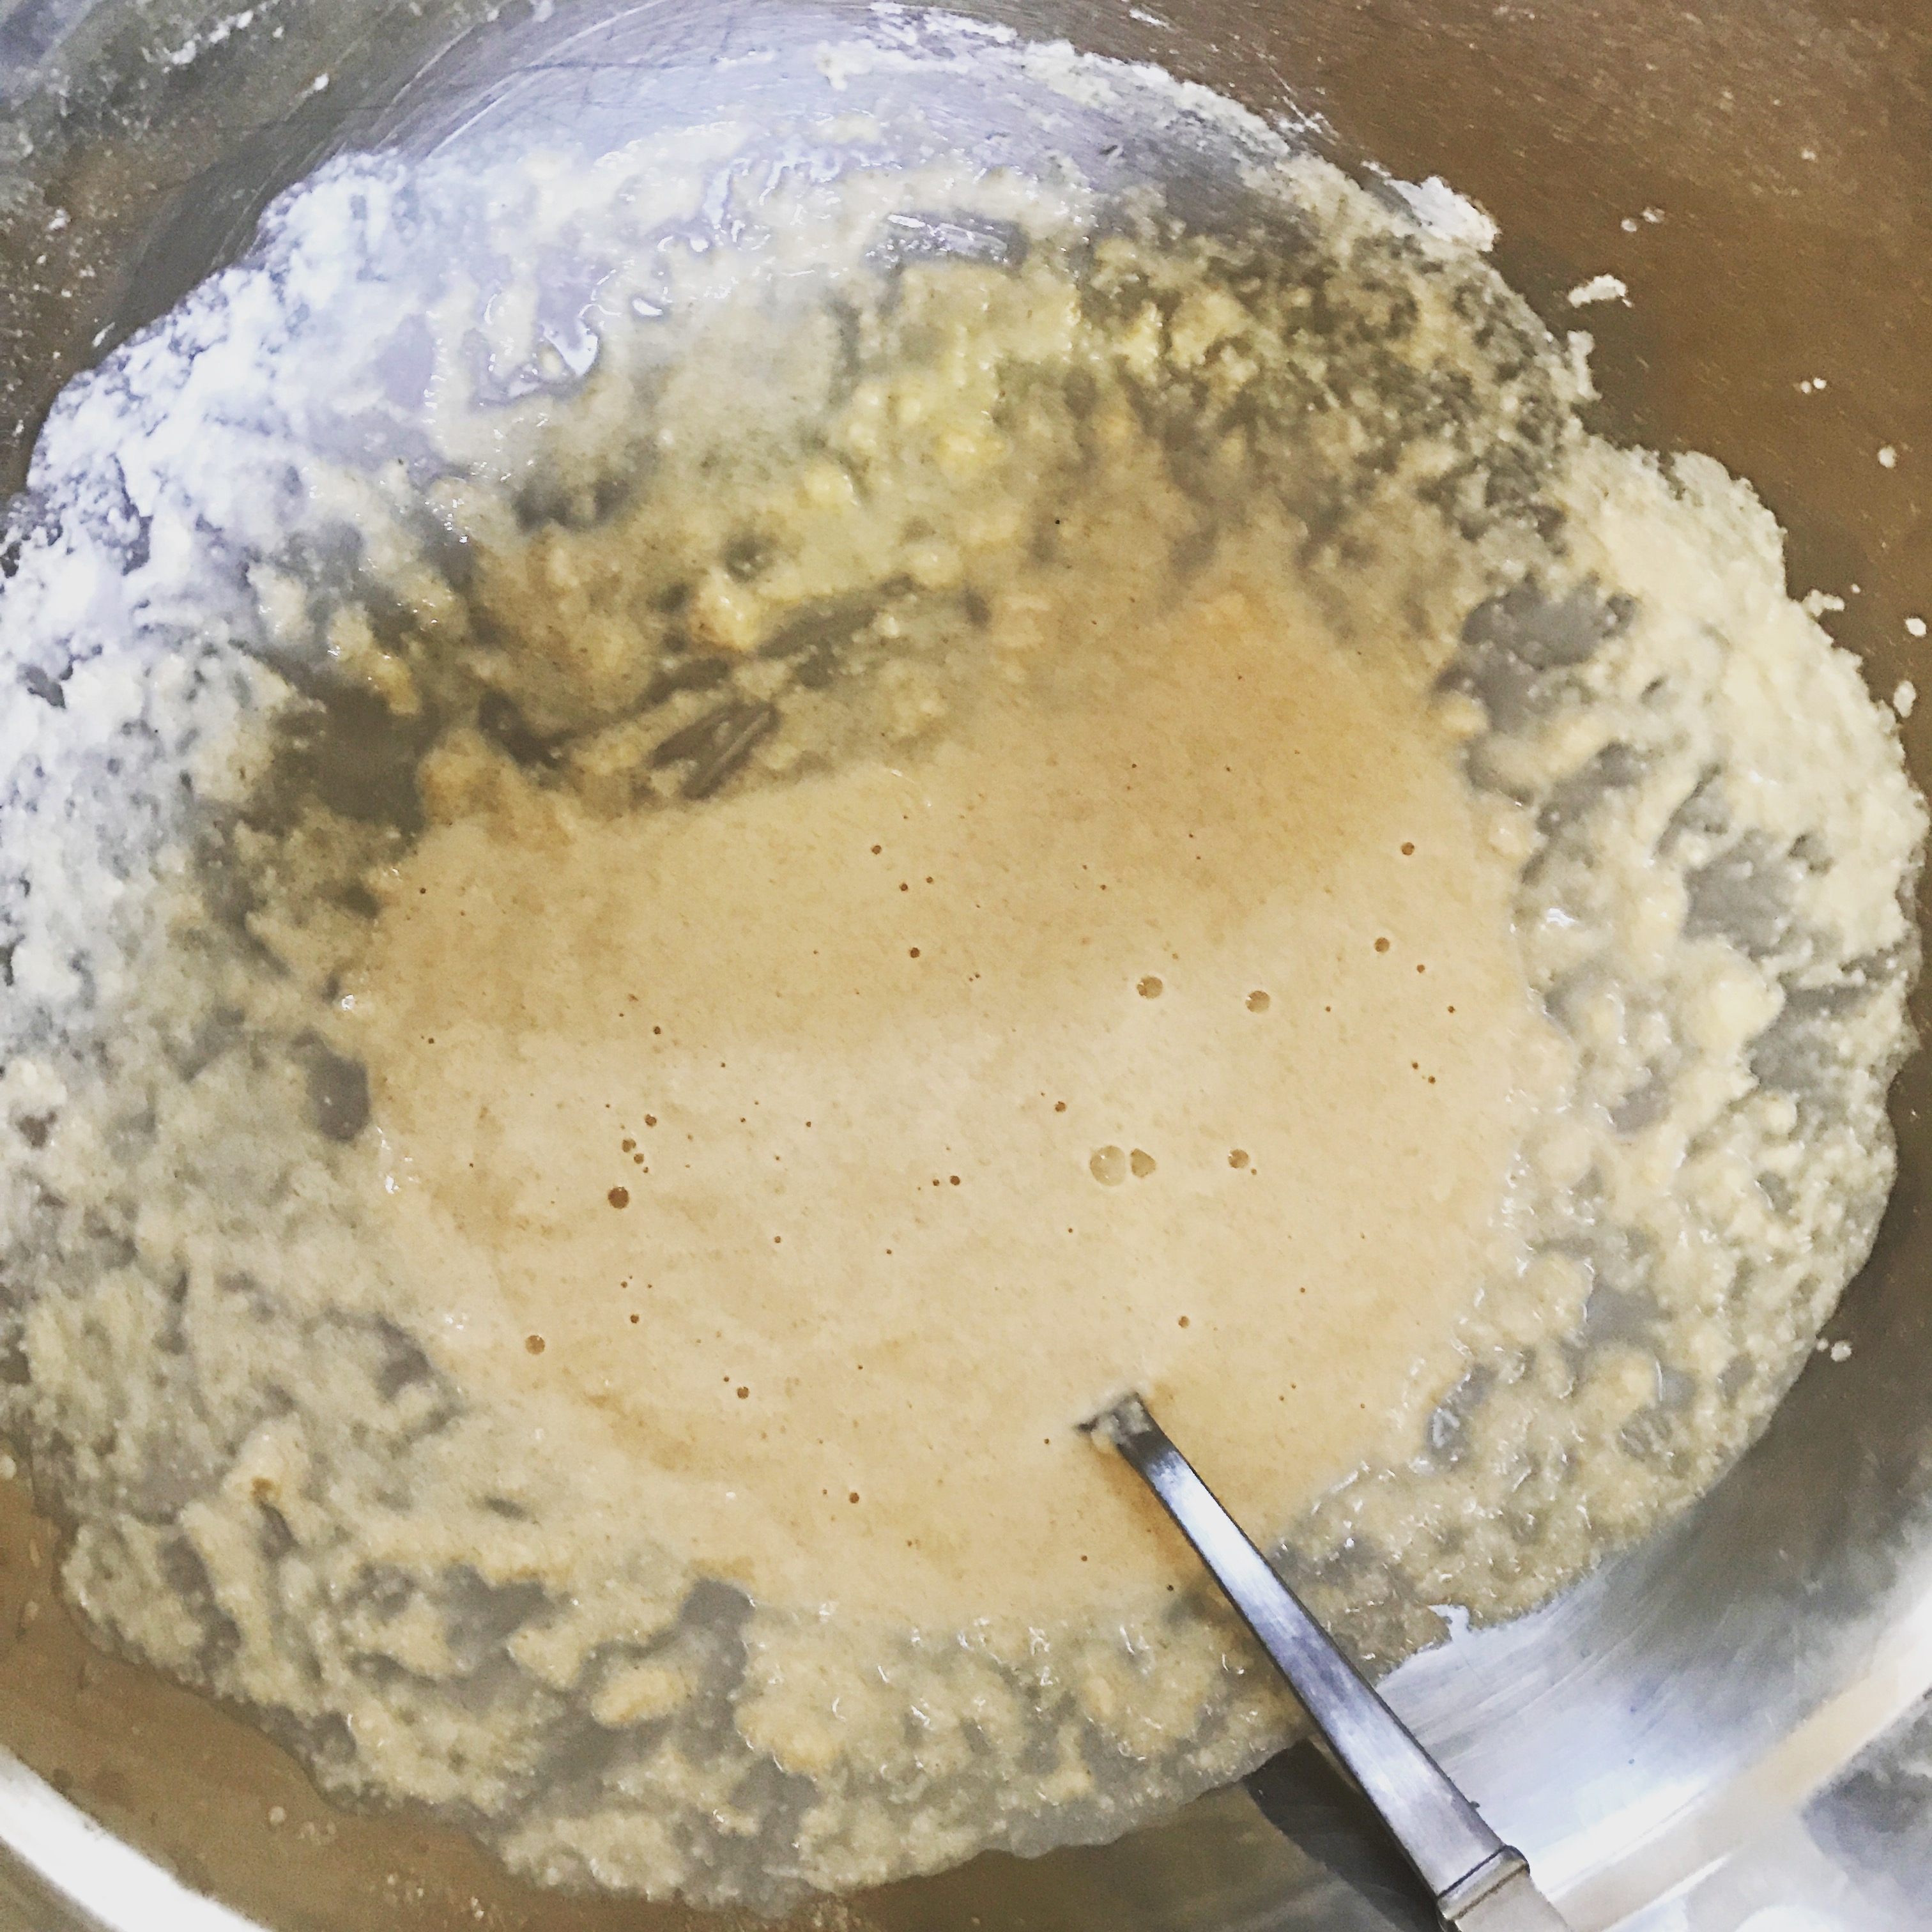
Mixing the flour paste with the butter-flour mixture needs to be a gentle and quick process to reduce the formation of gluten (which makes crusts more chewy than flaky). You can add a little more water if needed, a teeny bit at a time, to get the whole thing to gather into a ball:
When the dough is together it should not be wet, it should just be together enough, as shown below. Setting the dough to cool allows the flour to absorb moisture and chilling it before another handling will reduce the formation of gluten. Cover it to protect the moisture:
Roll out the dough on a lightly floured surface. Again, handle it as little as possible. It does tend to stick, so you could use a parchment paper underneath your flour to help lift it. My mum uses the rolling pin to help carry the dough to the pie plate:
Trim the edges of the dough and patch holes with the trimmings. Leave some overhang to help make a nice thick edge crust when paired with the upper crust: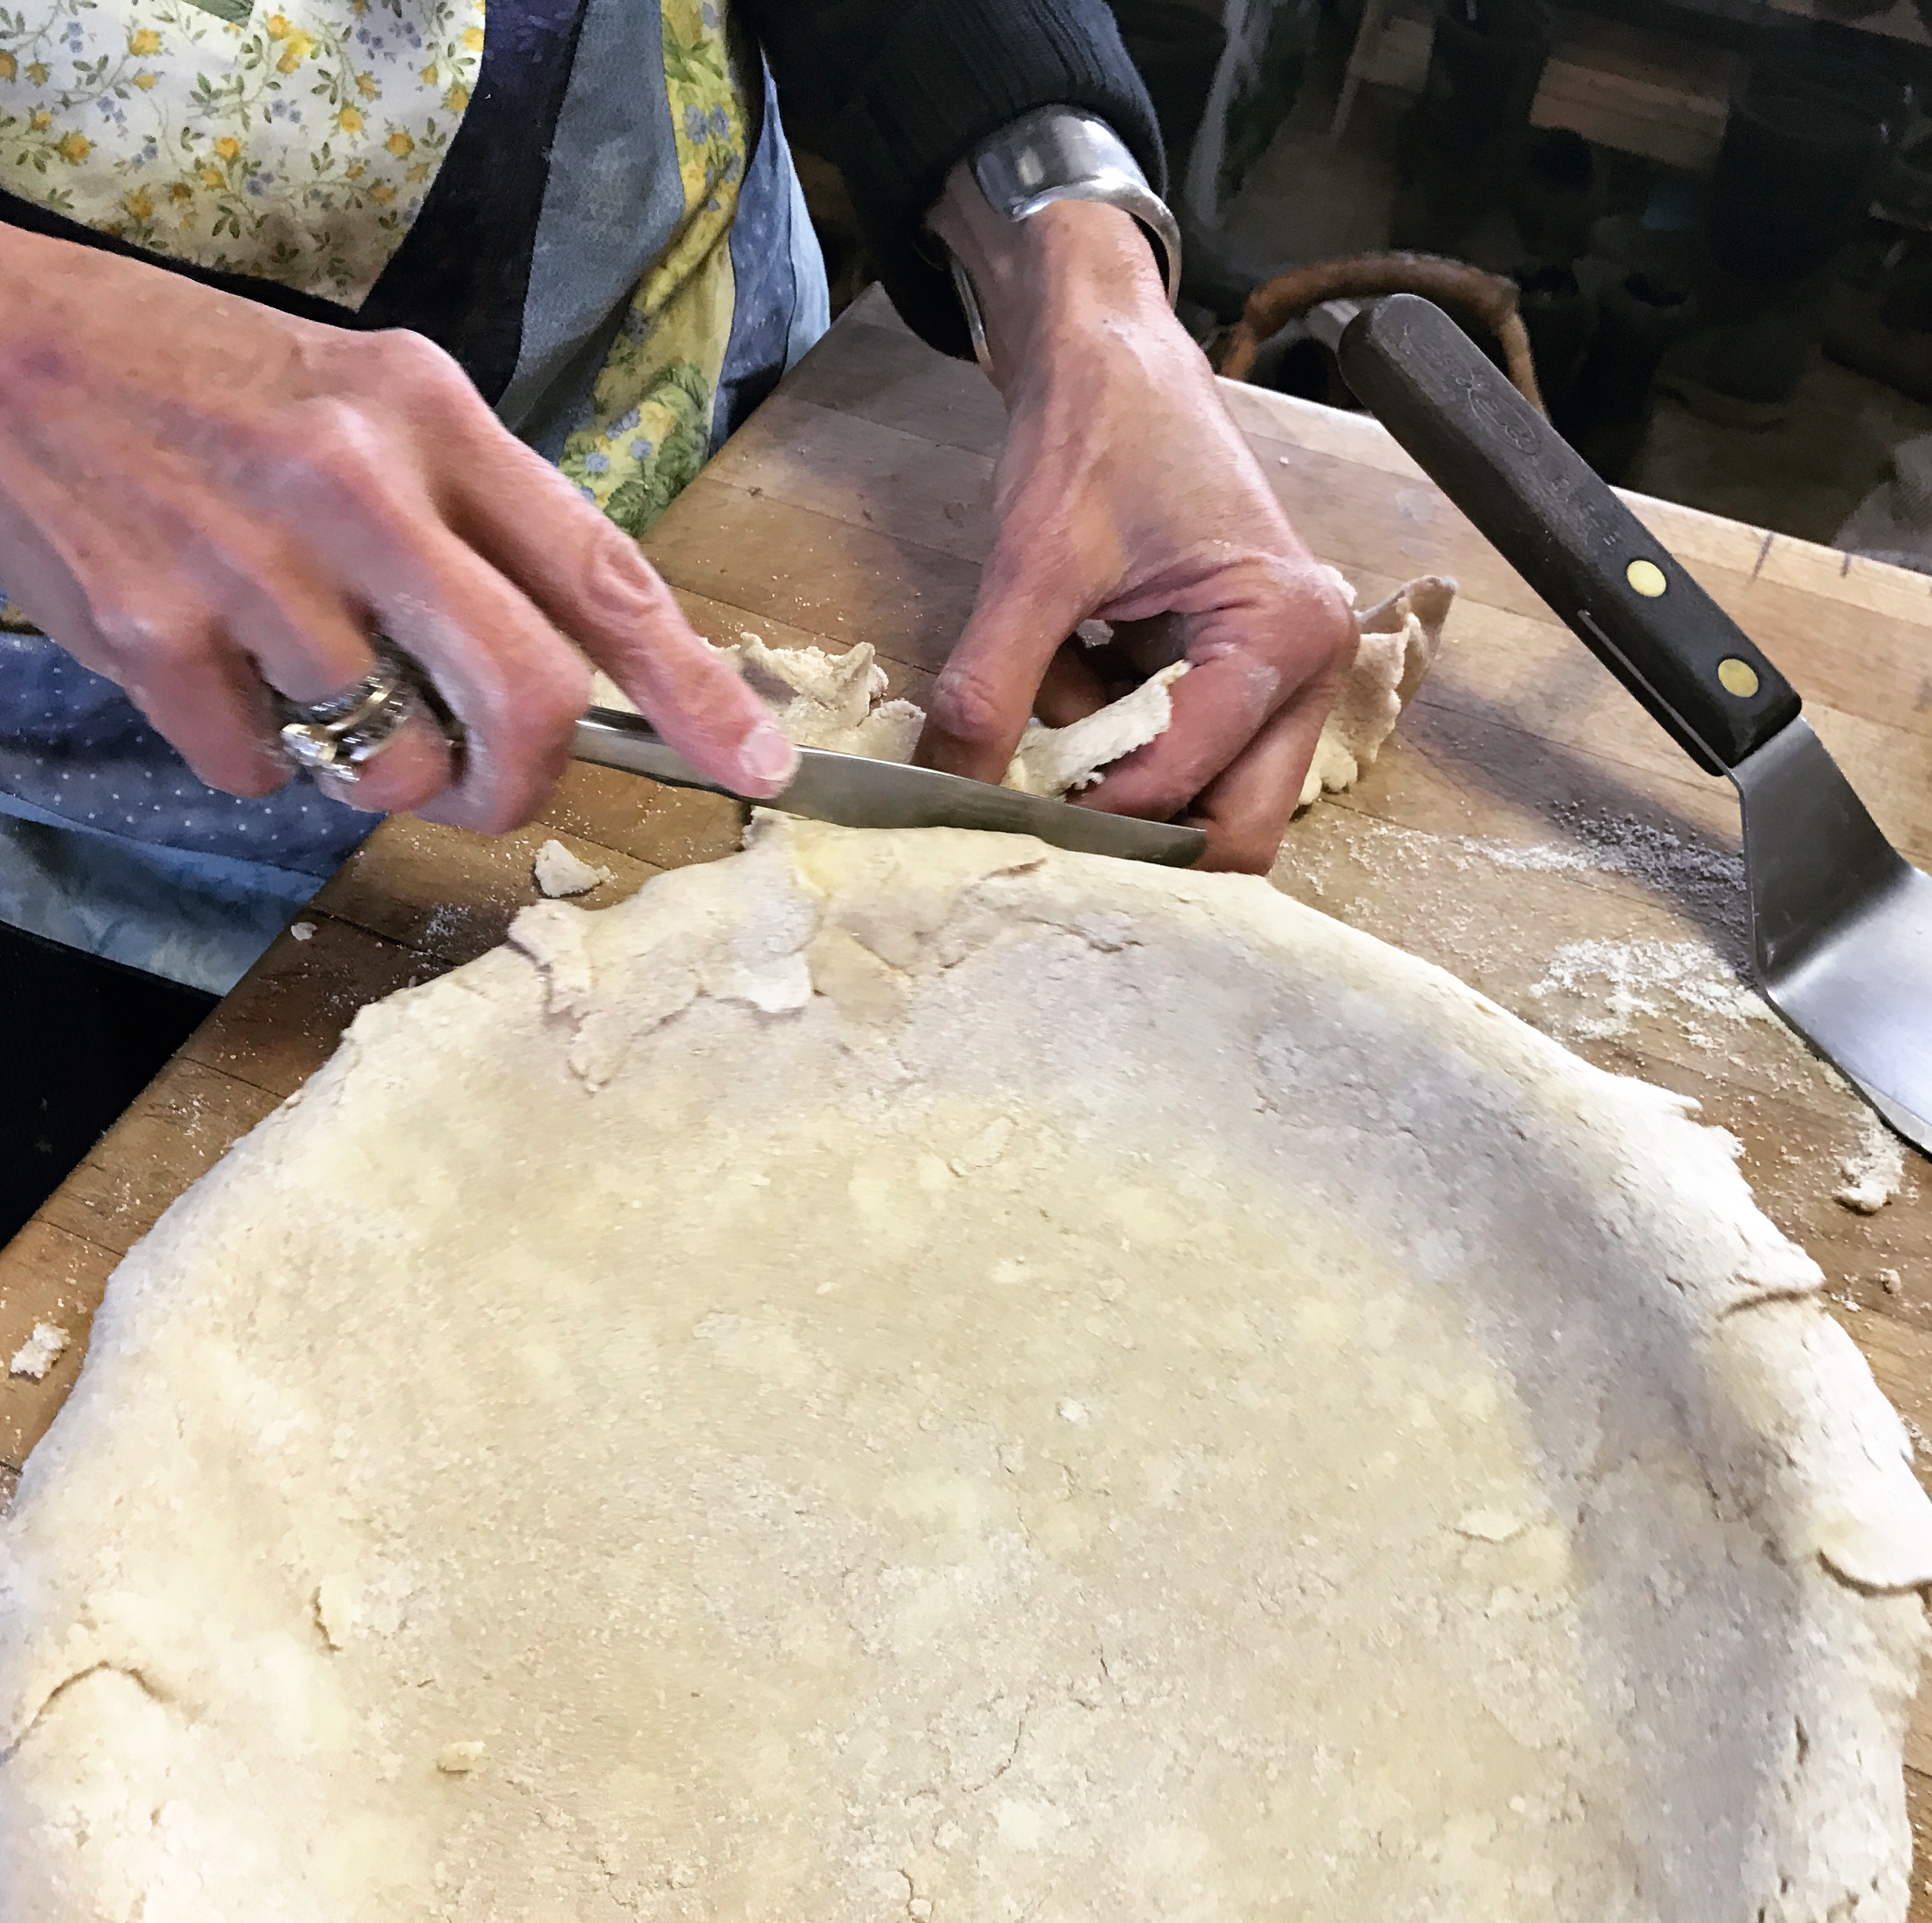
Mix apples and spices for the filling in a big bowl so you can get all the apples well coated:
Fill up the bottom pie crust, trying to get the apples as densely packed as possible. If you have enough upper crust dough, you can make the pile nice and high, as the apples will settle and condense while cooking, and you’ll get more apple in there:
Put the butter up on the top of the apple pile:
Now you can lay the top layer of crust dough, and you want the top layer to be big enough to fold over and under the bottom crust lip. You put both crusts together, and then fold the double layer under to create a sealed container of dough:
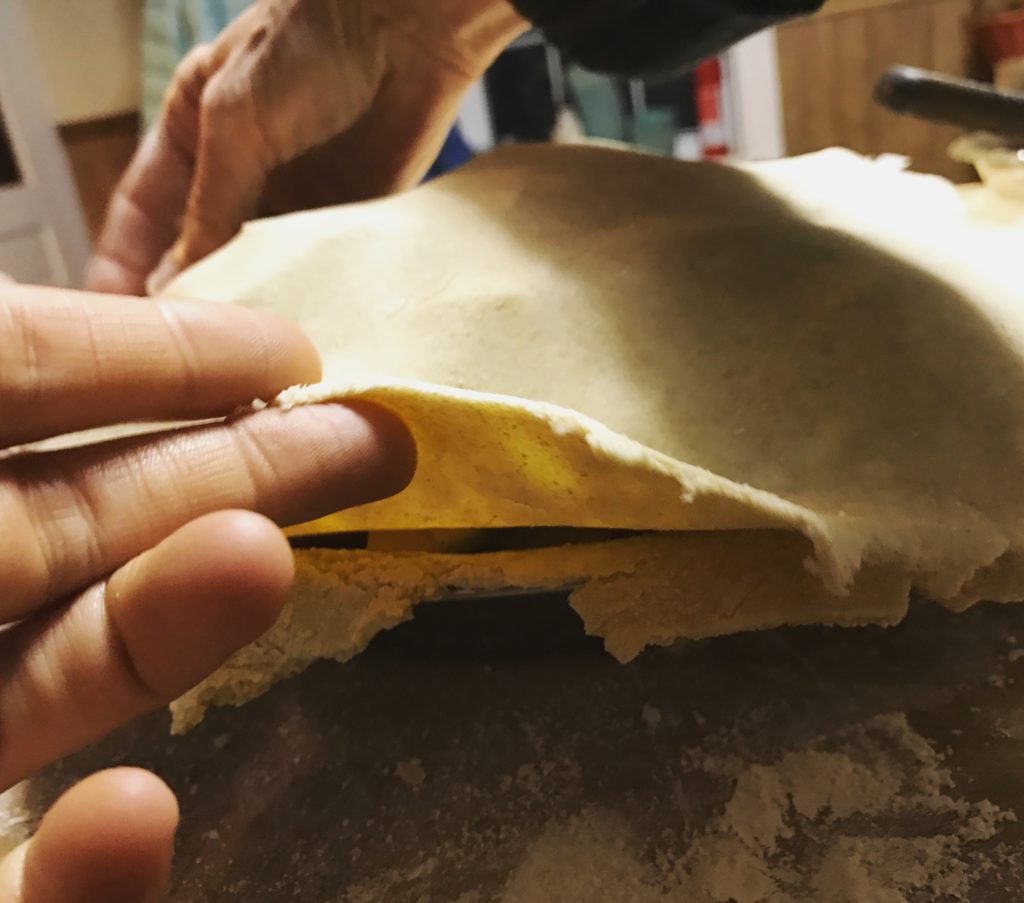
Here is how you get that fold:
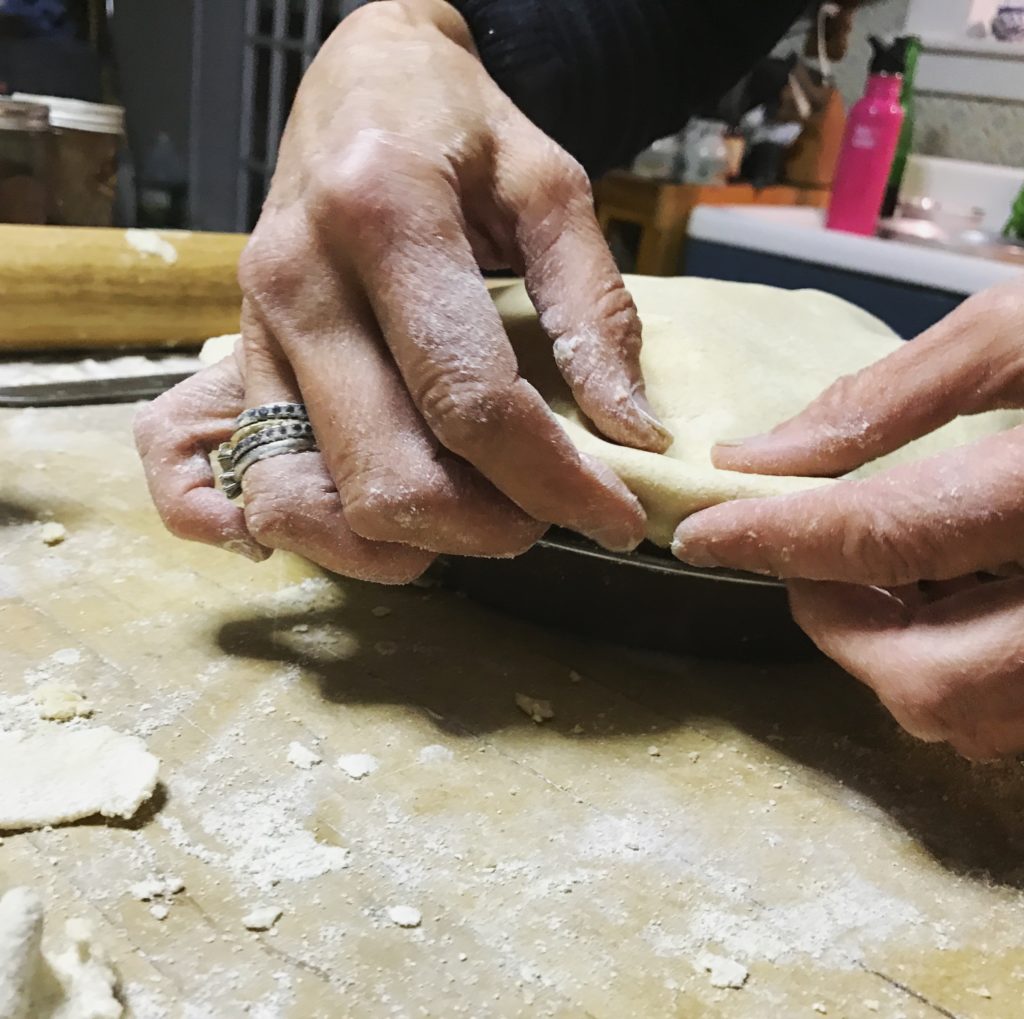
Below you can see how the top crust fold happens, and once you have the fold, you can crimp the edges down with your fingers to bind it. This type of fold helps keep the pie juices in the pie!
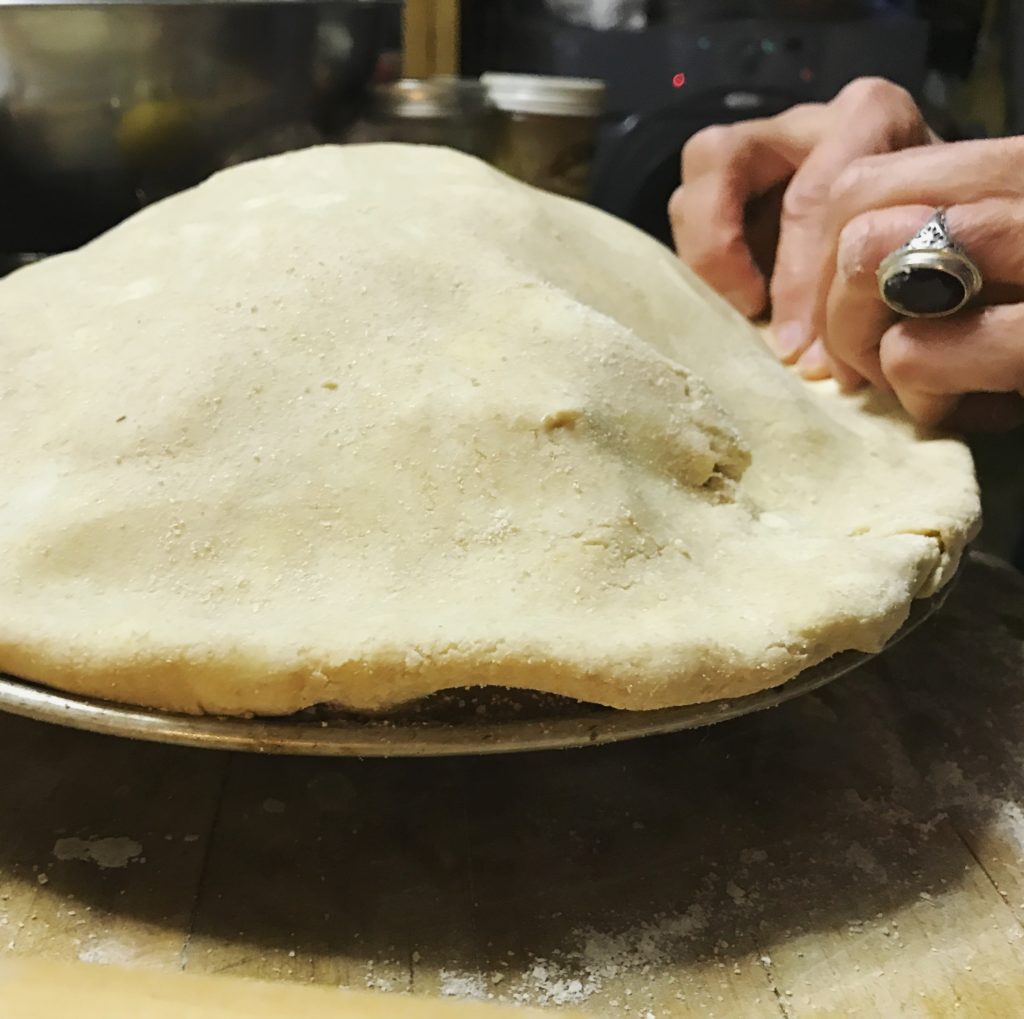
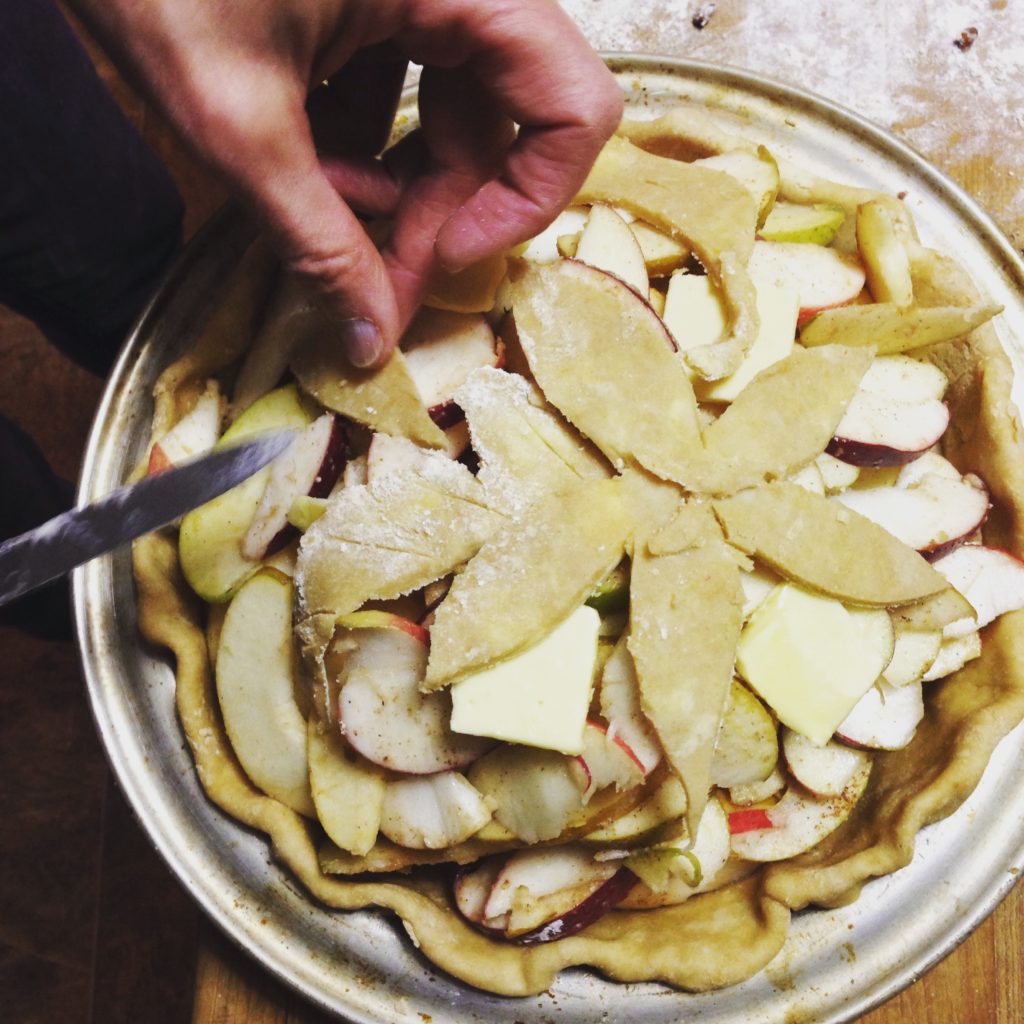
Make some good holes in the crust to let steam escape, and you might as well make a design! You can do these with a fork, or cut designs with a knife. You can also lay on extra dough cut into shapes for more styling.

Ready to set the pies in the oven!
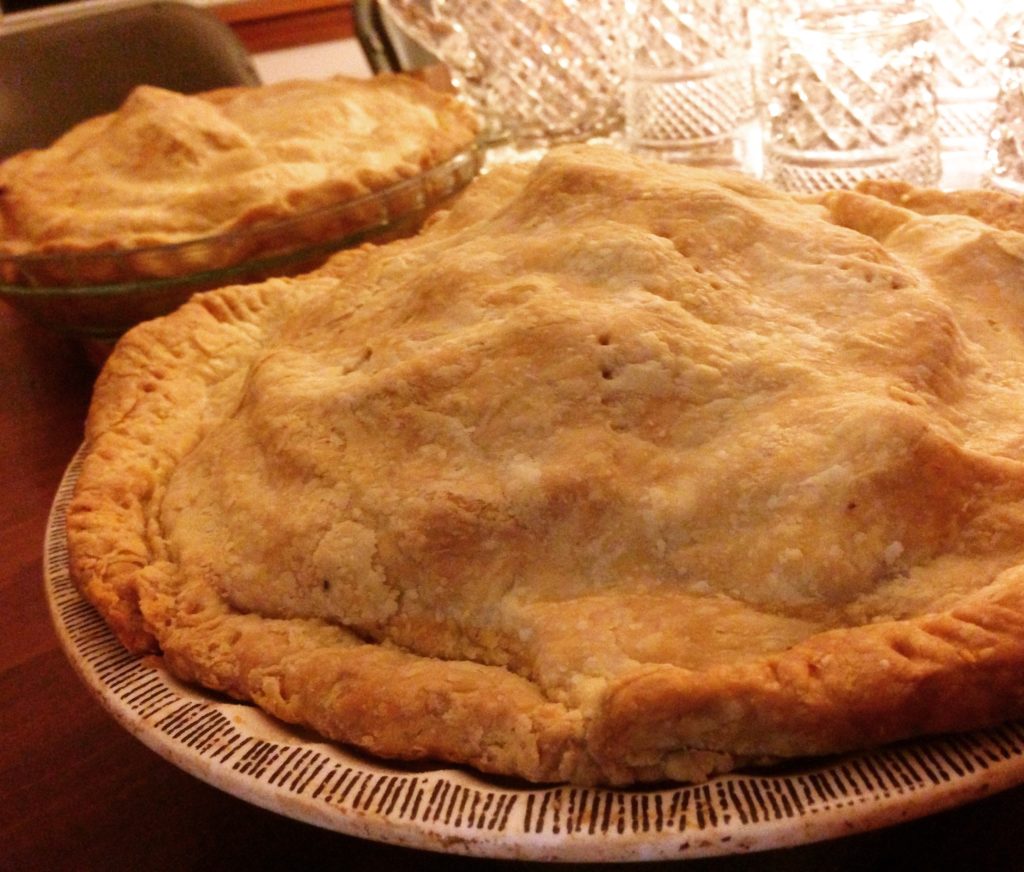
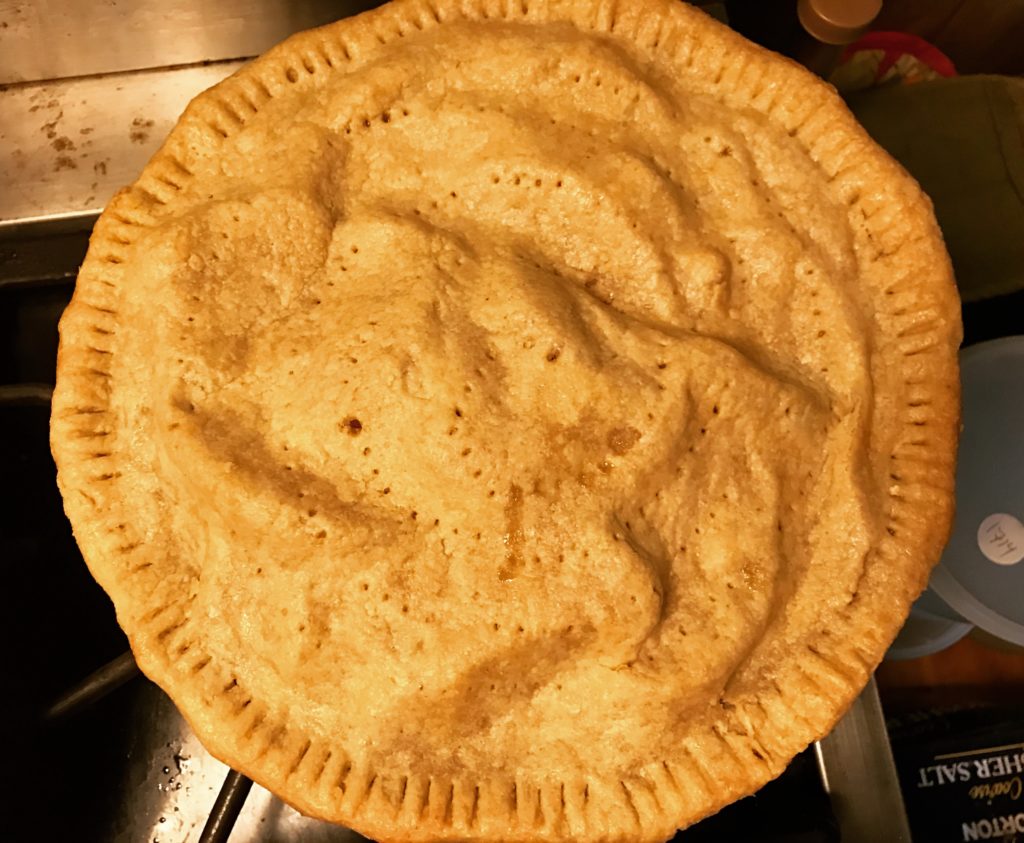
Here’s a pie, all golden and done, where we used a fork around the edges to crimp and make a pattern.
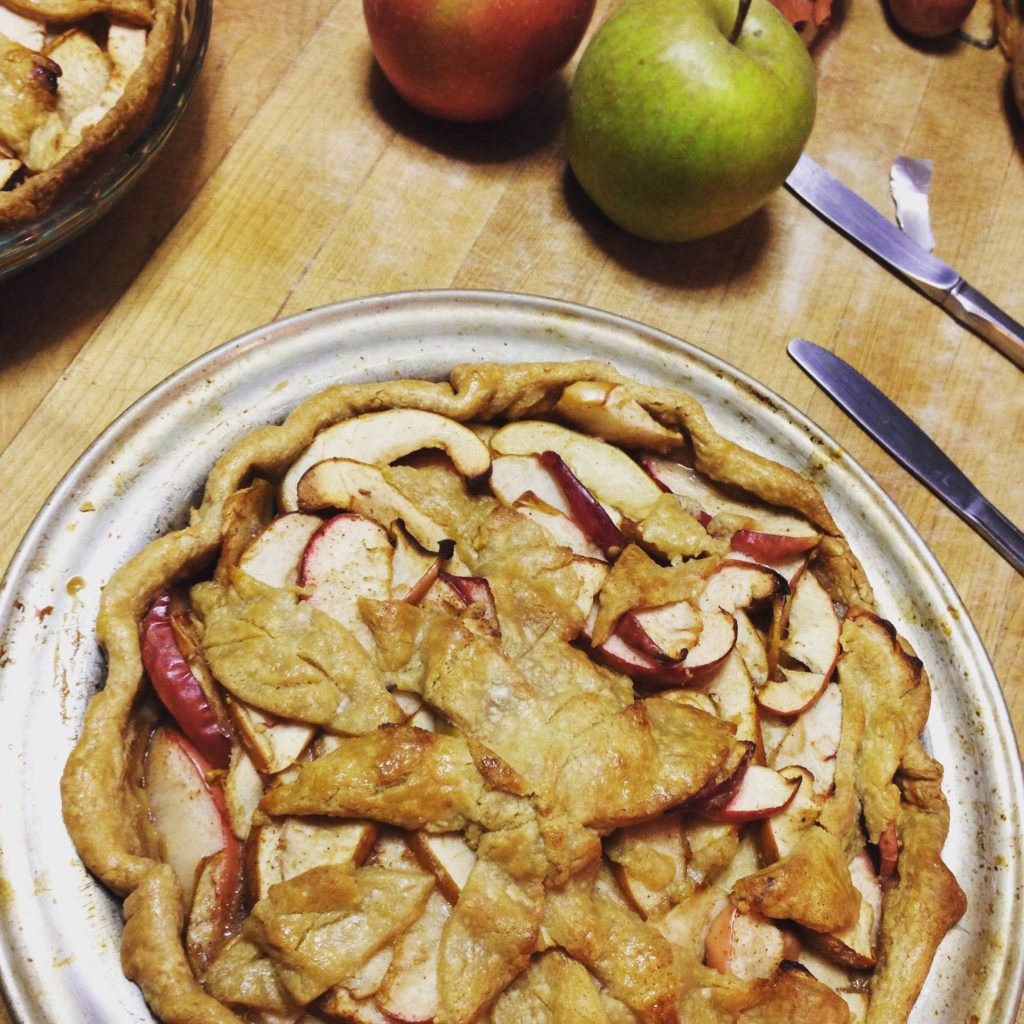
Here’s another kind of top you can make, by cutting shapes in dough and laying them in a pattern on top of the apples:
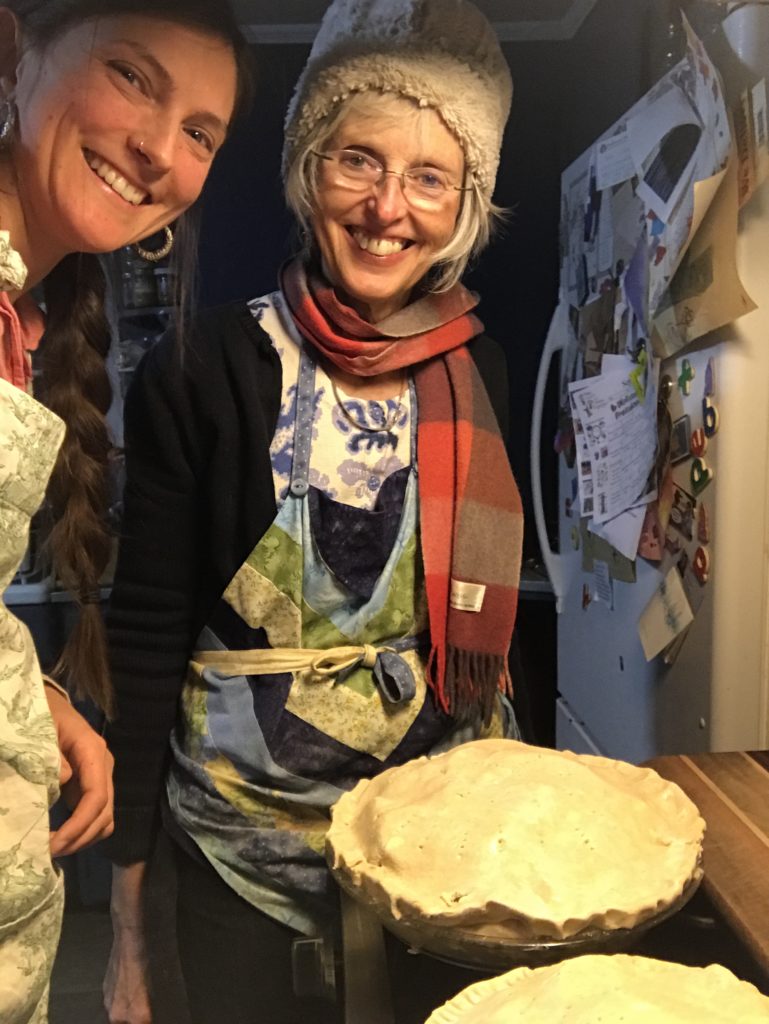
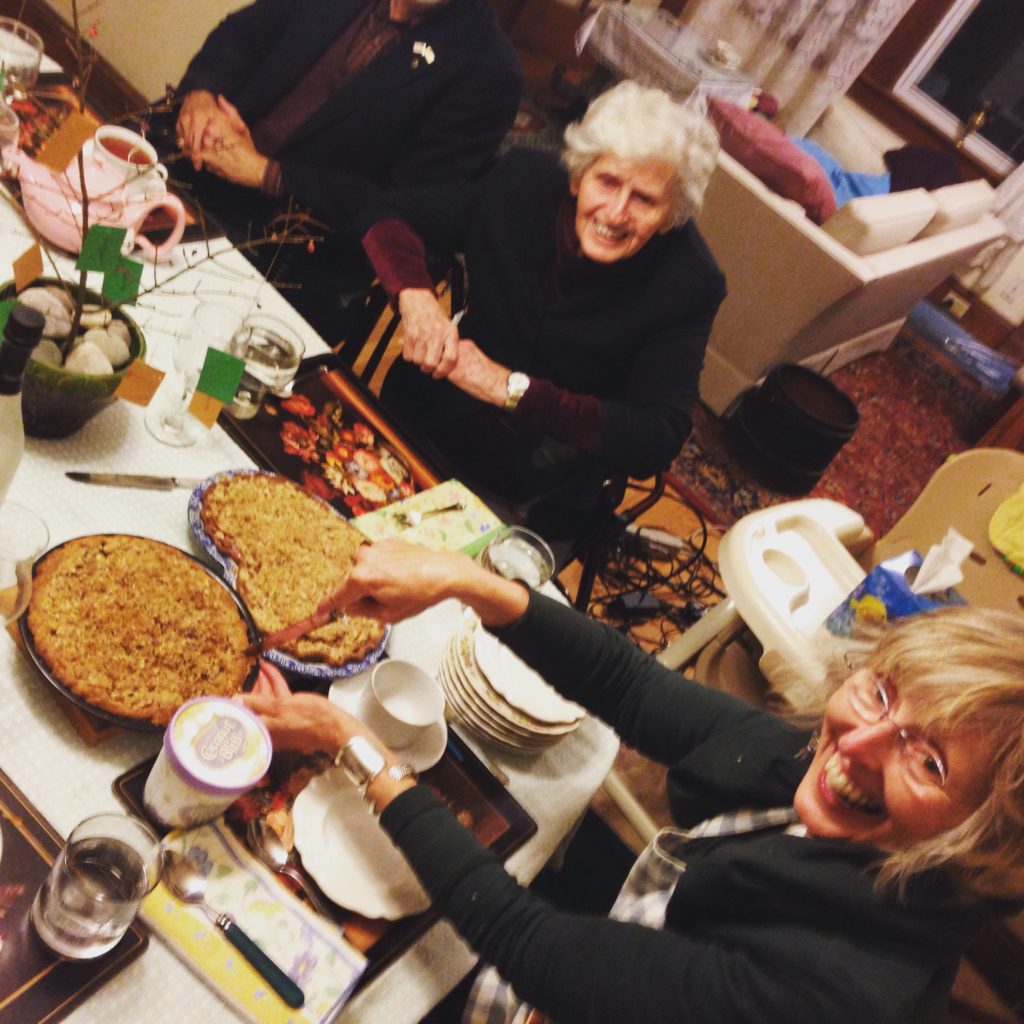
Everyone’s excited when it is time to cut into the pies! Here below we made a streusel topping.
Thank you all for reading! Thanks to my dear mum for sharing her art! I hope everyone has a wonderful season, filled with pie!
Cheers,
Sarah, Ella and the Red Fire Farm crew.